We will stand on principle, or we will not stand at all.
Klondike – The Lost Expedition – Beginner’s Guide
PAGE 3 – Energy guide (Yep, that’s what you’re here for, isn’t it?)
Table of contents of this page:
Energy Meter
1 . Hacking the game – what programs should you use?
2 . Priority strategy: max out your Energy Meter limit = Reach Level 78.
3 . Sources of energy
3.1 Time itself
Using time at Lands
Using time at harvesting.
3.2 The Energy Snacks.
Small objects (<=40).
Medium objects (size ranging between +45 and +90).
3.3 . Tips for Energy Snacks
Types of Snacks
Bakery flowcharts
Apples in-depth guide.
Bakeries: in-depth guide.
Large objects (+95 and beyond). How to chop them down without ever needing a Partner?
3.4 Secondary sources
Shovels and Hides
Beehive
Energy givers
Golden Palm
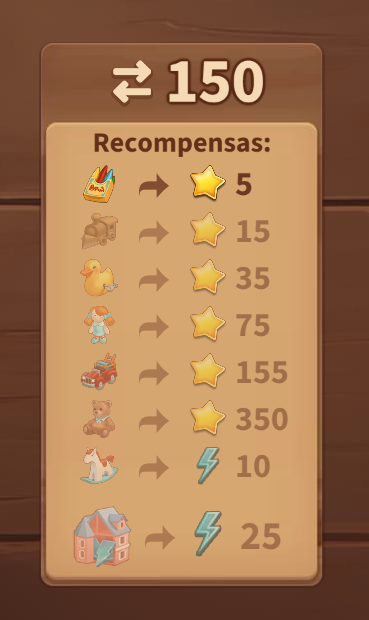
Prizes
Minor strategies. What to do when you have too much energy?
Main gameplay guides
As I stated before, Klondike is a game that comprises 3 managements:
You need to manage your farming life, source of raw materials required to make useful and much needed items. Which crops to grow, which livestock to invest in?
You need to manage your travels, as most of these items must be moved from site to site. Sled maintenance and cargo limit, animal feed and ultimately kerosene for Airplane.
You need to manage your energy level.
These three are not deeply intertwined, but you’ll need to understand all of them to play properly. That’s why the following guide may look difficult at first sight. I’ll talk about farming and travelling to explain how to make more energy. Then why not talk about farming and travelling first? Because energy management is the most important of the three.
Energy Meter
At the top of your screen, as show in previous section User Interface, The Energy Meter shows your current amount of Live Energy. Live Energy is the amount of energy directly accessible for immediate use. All other energy you have will be stored elsewhere. This mechanic was widely popular during the time Klondike was launched almost two decades ago. This limits the amount of actions a player can do in a given time and is the main drive for the player find ways to get more energy. The most straightfoward way, obvious, is to pay for it. But there are lots of other ways to get more energy , and you don’t need to spend a single cent to play at all.
We use energy for mainly 2 actions: to harvest crops and to chop objects. The other uses are to recharge special dynamites, interact with objects and very rare barters.
Your main problem as a new player is exactly the same as anyone with level 700+. There is just not enough energy. I mean, there is, but it’s not readily available in your Live Energy Bar… This list of tips addresses energy management and how to use it smartly.
1 . Hacking the game – what programs should you use?
Most of the players I encountered in Klondike are not computer savvy. We play Klondike as a hobby. As it’s not a competitive game, most of us will not even think about the possibility of hacking the game. But if you are a somewhat nerdy guy trying to be smart and shortcut your way into the game, you need to understand that there are other people smarter than you and they are willing to use your greed to take advantage over you.
So, let’s be clear: there is no hack. The entire game runs server side. Only the graphics and user interface runs client side. There is absolutely no way to change the amount of Energy (or any other item) from client side. The only way would be to crack the game’s server, which you cannot do.
You will find in Youtube, and other sources, the promise of getting more energy using programs called ”trainees”, add-ons to your browser or anything else. These are viruses. All of them are scams. If you try to hack the game with them, they will steal you private data, possibly banking/government information and compromise your PC.
If you are really so desperate for more energy, you are missing the point of playing Klondike at all. This is a ”vacation game”. You are supposed to take your time. For me, a free player that made lots of mistakes at start, it took about one year to have the game running smoothly. If you start in the right direction, it will take about 3 months. Let’s see some strategies to make this happen.
2 . Priority strategy: max out your Energy Meter limit = Reach Level 78.
You start playing Klondike with an Energy Meter limited to 15 Live Energy points. It’s enough to remove small stones and cut down small trees at your station. Also, it’s enough to start harvesting some crops. But soon you’ll realize that it’s far from enough to chop down big objects. Huge piles of Clay at Update Lands cost 165 energy points. Some big trees cost from 200 to 300 energy points.
It’s true that Wind Song, Aery, Ukthy, Darfoot and Polar-Side (the first permanent lands to explore) have smaller objects, but from there it will be expected that you have a bigger energy limit. As you level up, your energy cap increases every so often. Once you reach level 78, it maxes out at 44 energy with no further increases. That’s how the game is designed.
I strongly suggest that you start your exploration journey of OTHER lands only after you maxed out your Energy Meter limit. You can play the game normally; I mean, explore new lands outside Blue Peaks Valley (the starting zone) before level 78. But the reason of my suggestion is that the math required to juggle Live Energy is aimed for that 44 limit. All tips bellow will work just fine, you’ll just need to adjust the math.
Note: you can also pay the Unicorn Club monthly pass promotion and get +20 energy directly from the start of a new account. This way you can play as a mid-gamer from the very start. Due the low value of Brazilian currency, it’s too expensive to me (1 USD$ = 6 BRL$), but for American and European audiences, you may find it a good deal. It’s USD $20 for one month. USD$ 40 for three months.
In order to level up faster to 78, the main strategy at this start of a new game is to raise livestock. I’ll discuss strategies for farming in a following section, but for now keep in mind these main guidelines:
Cows are generous animals. They produce the Milk needed to have more of them. As long as you don’t sell all Milk, you can always have more cows.
To get more money (Dog Coins) to buy even more livestock, selling baskets of eggs is the way to go. At first, you’ll only be able to sell Chicken Eggs. You should skip Geese Eggs for now; they will be needed only later in game. As soon as possible, start raising Sheep and Turkeys. The Turkey Eggs Basket will be your primarily source of income for some time.
As you raise livestock, you will earn collections. For now don’t exchange them. Even though most of them give experience, it’s not the time yet.
The first milestone you need to achieve is to reach level 28. At this level, you’ll be able to buy Ostriches. They are expensive, but each one of their nests output 275 XP. This is the same for Peafowl.
As a new player, you should already have noticed that earthworms are somewhat tricky to get. As you need them to raise more birds, every new player will ask for Worms as a gift. Regardless how much grass you chop, the amount of Worms is never enough. But after you start raising Ostriches, you will eventually barter for Worms at home.
Raise some Ostriches and collect their nests. Don’t sell their eggs.
Stock a lot of dog food for the coming trips.
At this point, you should have already reached Polar-Side. There you can barter your Ostrich Eggs and Feathers for Ostrich Egg Baskets and bring them home. It will be lots and lots of trips.
The second milestone you need to achieve is to reach level 31. That’s when the Sugar Cane will be available to be harvested. It takes 72h to harvest, so you should start it as soon as possible. At this point, Wind Song should be already cleaned 100%. Cover it with vegetable complexes and harvest as many Sugar Canes as you can.
Now you can barter Ostrich Egg Baskets + Sugar Cane at your Cottage. Cottage is a special building that you buy from the Market for Dog Coins. It has useful barters, one of them is this one, where you exchange so hard earned materials for Worms. Once you reach this stage, you finally have a sustainable cycle for producing Worms and raise an unlimited amount of Birds.
Tip: the game has a soft limit of 500 moving sprites at screen. More of this may cause the game to glitch, or in some cases even crash your browser screen. Limit yourself to 500 free roaming animals, cows and birds, for a better gaming experience. Also, if the game starts to slow down, turn off all animations, as I explained before.
Now you need patience. You need to wait for the Monocle Booster. Boosters are items earned free from various events, especially Construction Trust, which occurs very often. You can also buy some of them in certain occasions. The Monocle doubles the XP earned from every source. Once you acquire one, do the following:
Store all decorations and remove all small buildings. (Clear the whole Home Station, except for the Cat.)
Feed your Ostriches until the whole station is covered by their nests.
After the station is covered, activate your Monocle Booster.
Send the Cat to open all nests (it’ll take almost 1 hour with animation on, just the time limit for the Bronze Monocle Booster to expire)
Sell all those collections you stored for so long for double XP.
The Monocle will double the XP of everything. I’ve done this when I started playing. During this hour, you will gain lots of experience. I remember jumping level after level, and earning the corresponding Emeralds for that. Do it a couple times and you will reach level 80 “very fast”.
This strategy focuses on levelling as fast as possible without Bakeries.
You can speed it up even further spending Emeralds to unlock Ostrich and Sugar Cane at early levels.
Also, you don’t need to clear Wind Song and Aery before reaching Polar Side. You just need to complete the questline of these 2 lands.
For the starting Worms, you really shouldn’t buy them for Emeralds. Combine Water Wells and Fountain for Coins to get Grass. Each patch of Grass drops 1 Worm.
Story time:
I wrote “very fast” with quotation marks. This starting phase of Klondike is terribly bad balanced. I would say it has no balance at all. The vast majority of players abandon the game here. It takes too much time, too much effort with no visible or sensitive gains.
You’ll feel totally stuck. Entering the game day after day without feeling progress. If you didn’t made my mistake at start and built some bakeries, at least you will be able to do some exploration, harvest more crops, gain XP faster. But for me, for some months, Klondike was only about raising virtual livestock.
Not only that. You’ll also need Cotton (lots of it) to make Cotton Threads and then Fabrics for starting barters. Large production buildings will need more workers, who in turn need more housing, which in turn need more items. And Beet (lots of it) to dye that Fabric into Ribbons.
It felt like opening a tight knot or trying to start a clogged engine. With no clear starting point, it will take some time to make such nonsensical chains of production sustainable. After this stage, the amount of goods you produce will be so large per batch that you may take months between each one without notice. If you follow the Industrialist path I mentioned earlier, you will raise tens of thousands of birds daily.
The starting point is very hard. Later the game breezes, becoming very easy and enjoyable. Don’t give up.
3 . Sources of energy
3.1 Time itself
The first source of energy is time itself. If you are patient, every 3 real life minutes, your Energy Bar will replenish 1 Live Energy point until it reaches your current limit (maxed out at 44). Even though it is impractical to play only using energy given by time, it is not so unusual to encounter a situation that merely waiting up some minutes is better than other workarounds.
At Lands
At the very beginning of the game, at your Home Station, Wind Song and Ukthy, waiting for energy to be naturally replenished will be part of your gameplay. The starting sled is too small and, for now, your Energy Bar is even smaller… Be sure to have enough Porridge for the Dogs, because your will travel a lot farming snacks. This phase will end and it will teach you how to farm them.
Chopping the correct things at correct order will drop energy snacks, mostly Honey (+5, +10, +15), Plums (+1) and Apples (+2). They will let you keep playing for more time each gaming session. I’ll cover them next section.
At this point, The game loop is as follows:
1 – Chop small trees and grass.
2 – Your energy bar is so small that you can just grab a snack (real life) and wait for it to be replenished.
3 – Chop more small trees and grass.
4 – Bring the loot back to your Home Station for Energy Snacks.
5 – Bring the snacks to the land and continue the loop.
At higher levels, waiting for enough energy becomes unfeasible. To chop an object sized 40, you would wait 2 real life hours if your remaining energy is 0. How to exploit the timer then? The only way I know is to never replenish the Energy Bar completely.
When you hover your mouse over the Energy Bar, it will show up a note. Observe the timer running at its end.
When the Energy Bar fills up completely, the timer resets. However, if you eat small snacks to keep your energy level below its max, the timer continues running. Every 3 minutes you get 1 live energy point, as long as you don’t fill up. It’s a somewhat good strategy for mid gameplay at permanent lands to help clear all small objects (<=40) in a land, before going up the bigger ones. In one hour of gameplay, you get 20 energy points, more than your Energy Bar at start.
At harvesting.
There are a lot of techniques I’ll discuss for harvesting later. Now, focusing at the very start of the game, you need Rye and Fire for Porridge. You really shouldn’t use Chicken Eggs for Porridge, because you lack Dog Coins currently. Selling Chicken Eggs Baskets will be your main source of income for a while.
Rye takes 15 minutes at most to grow. During this time, you receive 5 energy points. As you level up and access better Hot Beds, the output increases and the time required decreases. You can take advantage of this to focus part of the day tending to your farm.
In fact, as I suggested in the previous section, I feel you should focus in farming before adventuring. You need Bakeries. To use them, you need lots of Rye, Wind and Stones to make Flour; Dry Twigs and Grass to feed Cows, Cows to produce Milk, Milk to make Buttermilk, Buttermilk to make Energy Snacks. Right now you are starting this complicated chain of production and Klondike has no sense of balancing gameplay.
Until you reach a certain point, sticking to Farming gives a better use of your low energy levels.
3.2 The Energy Snacks.
Ok, now that we have a general overview of the natural energy production, let’s see about how to get more energy. First, let’s explore the main method of getting more energy, then we will see the secondary energy sources and the strategies to use them.
As the main core of gameplay mechanics, acquiring and wisely consuming Energy Snacks is the way how you give your character ”fuel” to perform various in-game tasks. Note that I highlighted the word wisely. Because dealing with energy math is an essential part of the gameplay. As I stated before, this math is aimed to the 44 energy limit, especially in temporary lands. This math scales with your level in event lands, such as Mazes or Tiger Mines, but is fixed in other lands.
The game mechanics for using snacks is quite simple: up until you reach 1 point below you max level, in this case +43, you can eat any snack. This means you can go beyond your Energy Bar’s limit, accordingly to the size of the snack used. However, you cannot eat any snack if your limit has been reached or surpassed. It means that if you are at +44 energy or over, you must spend you energy until reach +43 or below before eating another snack. As a mere indicative of how this math plays:
Small objects (<=40). These small objects, such as small patches of grass, bushes and even the smaller trees are abundant. They serve as a visual guide for you to complete that land’s main questline. Chopping the smaller objects in a land guides your path as you explore it. You never really get lost in Klondike, despite its name! :-)
In some lands, you can complete the whole questline only chopping the smaller objects. In Event Lands, usually you can go as far as 70%, or at least 50% of land’s completion only chopping the small ones, receiving the corresponding prizes.
There is no real strategy here. Just eat your available snacks sensibly.
Note: The same principle applies to Update lands, but the path is guided by medium objects.
Medium objects (size ranging between +45 and +90). In this range you need to learn when to consume your common snacks and uncommon snacks. Uncommon snacks is a generic term for snacks that you cannot make, only earn. You get then very often from events and prizes. By themselves they are not enough to clear a land, but help you a lot saving Raspberry Chimes.
Examples:
+45 objects.
– Energy level +40 and +5 Honey, or
– Energy level +30 and +15 Honey, or
– Energy level +43 and +2 Apple.
+50 objects
– Energy level +40 and +10 Honey, or
– +15 Honey x2 and +10 Honey x2, or
– +10 Honey x5
+55 objects
– Energy level +40 and +15 Honey, or
– Energy level +30 and +25 uncommon snack, or
– Energy level +20 and +35 uncommon snack (save your Cheesecakes!)
+60 objects
– Energy level +40 and +20 Pie, or
– Energy level +30 and +30 uncommon snack
+65 until +90 objects
– Energy level +40 and the corresponding snacks of +25 until +50.
You can also use Raspberry Chimes (+40) for +80 objects
and Blueberry Pie (+50) for +90 objects.
Keep in mind that we should calculate the amount of energy not only for the immediate next object, but also the second next. The easiest example I can think of is the chain of objects bigger than +50.
1 – Reach energy level +40 then eat a Raspberry Chime.
2 – Now with +80 energy, chop the first medium object.
3 – Replenish your energy up to +40 with smaller snacks and eat another +40 Chime.
Looping this way, you chop down all objects ranging from +55 up to +80. For a large map, you will need hundreds of Chimes, so it’s good to save as much as possible eating the uncommon snacks you earn along the way!
As the starting base or as the amount to be added, the number +40 appears everywhere. This reflects the importance of managing your stock of Raspberry Chimes, unarguably the most important energy snack in the game. Currently I have 36 Bakeries. They output 108 Chimes per day. Looks a lot, but they should be used wisely.
If you use Chimes to reach energy level +40 and also use a second Chime to reach +80, you may be wasting this type of snack. Any other smaller snack can help you reach +40. The main point here is to calculate the final energy amount after consuming the snacks. Raspberry Chimes (and other large snacks) should be used to overcome the Energy Bar limit.
3.3 . Tips for Energy Snacks
Energy Snacks provide you a wide range of energy supply, coming from +1 Plum (more useful than it seems) up to the delicious +500 Slice of Pizza. Let’s break down them.
There are many different energy snacks you can acquire throughout the game. These types are:
Common renewable. These are made at Bakery. You can make them yourself, costing you time and common resources. The more Bakeries you have, the more snacks you can output daily, providing you have their needed raw materials. I put their recipes flowchart just below to help you guide yourself.
Cookies. They are too small to be worthy the time and resources needed to make them. I suggest to just skip them.
Pie. Pies provide +20 energy and are interesting to make when you don’t have enough Raspberries. Warning: they require more Flour to make.
Cheesecakes. Cheesecakes provide +35 energy, increasing your object limit to 78 (43+35). However they require Chocolate to make, what makes it quite expensive. They are needed to make more Barns and increase your trading limit. Check the section about Gifting to learn more.
Raspberry Chime. Your main drive, it gives +40 energy. They should be the focus of your Bakery daily production.
Blueberry Pie. The most expensive common snack, it gives you +50 energy. I’ll detail its use in the following section “How to chop Large Objects”).
Bakery flowcharts
The Blueberry Pie is the highest common energy snack available to be made by the players. It requires lots of resources and time. It is the most expensive of all and gives you +50 energy.The Cheesecake is the second highest expensive item and gives +35 Energy. It’s main purpose, however, is to be used in the construction of more Barns, as they require 5 Cheesecake each to be made. Barns are necessary for trading and gifting, as the amount of items exchanged is limited by your number of Barns.Unarguably the most important snack, Raspberry Chime is your main source of Energy. At first, the flowchart may be too expensive, but as your gameplay progresses, you will find plenty of Clay, Stones, Coal, Grass and Wind to mass produce it.The Pie +20 Energy is your cheapest option for mass production. Bread +5 Energy requires Salt, which is only available in hides or dev gifts (non renewable) and Cookies +10 Energy requires large amounts of Sugar Cane (72h crop).
Common non-renewable. These are the snacks you can make yourself, but are limited due resources which are not easily harvestable or are much more harder to get.
Bread. To make Bread at Bakery you need Salt. Salt can only be acquired checking hides (your own or at your neighbours), or rarely found in gifts.
Bartered. There are many lands that allow bartering snacks. You can check them all at your Observation Tower.
Tea. Tea leaves are needed to make Tea and also the Tea Shop building, which is a Premium building (or earned during certain events). There are 4 different Teas. I’ll cover them all in a separated section.
Tip: At your Observation Tower, in the search field, you can type the “+” symbol. It will show all available lands that have both snacks and Falling Backs to barter.
Common limited. In many lands, you will find limited snacks to barter. They are effectively limited in number by their resources. These resources are limited in number, restricted to those lands. Once bartered, you cannot have more of them.
Uncommon snacks are snacks that you cannot make, only earn. You may acquire them from prizes for completing lands, chests or other loot brought home. They come in medium quantities and help a lot clearing lands.
Tip: Use your uncommon snacks before using the ones you make yourself. It helps you save resources and diminish the variety of snacks you have to deal with. When you have too many different snacks available at a time, you need to search the right ones amongst them every time you replenish you energy.
Special. There are 2 special snacks in normal gameplay.
Ice Cream. It gives +100 energy. It’s made at Jim’s Farm, accessible from Heartwood permanent land. You produce the required resources at Heartwood and barter them plus 1 Blueberry Pie for 1 Ice Cream. It rewards players that stay online longer times with 1 Ice Cream per day.
Olive Mayo. It gives +100 energy. It’s made at Tasteland, a strange permanent land. It is too far to be harvestable, too full of natural decorations to be decorated freely… It has many barters involving Mayo but all are a waste of time with the exception of the +100 snack. It rewards players that stay online longer times with 1 Olive Mayo per 2 days.
Now that we have a general overview of the types of snacks you will encounter in your journey, let’s try to get the most of them.
+1 Plum and Chanterelle
Plums are more useful than it looks. The tooltip disregards it as a very small snack, however its usefulness come exactly because it is small. In your adventures, you will come across many objects that are not round numbered towards multiples of 5, e.g. 42, 37, 19, 23 and so on. If you would only eat the snacks that give more energy, you would end up stuck into the “44 trap”. It happens when eating a snack sums up to 44 due game’s math.
In this case, you are forced to use 1 energy (or more) to bring your energy level down and allow you to eat other snack. Even though it’s not a serious problem, it becomes an annoyance in certain maps where the objects lead to it. Also, it becomes an even worse annoyance when there are no more small objects in the map. You are forced to go back home, use 1 energy point (or more), and go back to the land. (Remember you need to eat another snack under 3 minutes, or it will grow up from 43 to 44 again due natural energy renewing)
Plums solve this problem, allowing you to fine tune exactly the amount of energy you have in your Energy Bar before eating a bigger snack. They come in medium quantities from clearing a land, easily piling up in your storage. Using it wisely, you can amass enough to substitute Apples in some cases. It is also useful to reach the magic number 43, which I will discuss later during “How to chop Large Objects”.
Chanterelle: never use your Chanterelle. Chanterelles are an uncommon snack dropped usually by stones when brought back home. These mushrooms also give you +1 energy. However, they can be bartered for a better snack. Both Wallmond and Woodside allow you to barter 3 Chanterelle + Fire to the snack Fryed Chanterelle, which values +6 energy. Therefore, you can double the amount of energy they provide.
Tip: Save all your Chanterelle to barter it for Fryed Chanterelle at Wallmond or Woodside. Even though it comes less often than Plums, you still can amass some after some adventures. Fyring then makes 300 Chanterelles into 600 energy.
Tip: +6 Fryed Chanterelle messes up a little in the “snack math”. I use all of it for harvesting crops, saving some of more useful snacks for adventuring.
I always barter my Chanterelle at Woodside, but Wallmond is nearer the Home Station and has the same barter. For efficiency, prefer Wallmond.
Apples, in-depth guide.
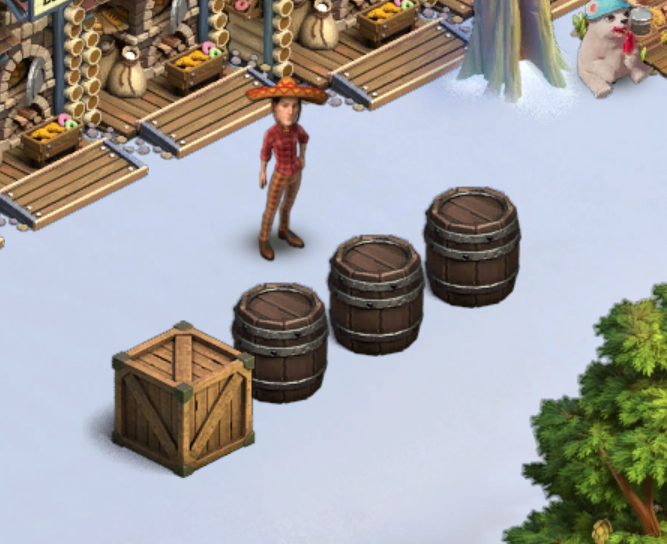
Here you see the home of my doll. I call him “Sombrero”. There is an Apple Tree, the Dog’s house (his name is “Xereta”) and my army of Cats. I call them only ”cats”… That Strawberry Tree is a reward from Wallmond.
Apples have a special place in Klondike. For some, they are the most consumed snack by far numbers. For others, the effort to get them does not fit their play style. Apples are a special snack. They can be harvested, bartered or dropped by loot brought home.
Acquiring Apples by looting: they drop from various sources, mostly fresh grass. They drop in somewhat medium to large amounts, depending on the land you are working in. Using Apples acquired by looting is just like using Plums. Efficient and wise consumption can help you amass lots of it. In this case, you will find yourself juggling Apples, Plums and Honey snacks to reach 40, before eating the snacks made at Bakeries.
Acquiring Apples by harvesting. Apples can be harvest from Apple Trees. These trees, however, are premium trees. Each tree will cost you Emeralds. Each Apple Tree will give you 100 energy (harvesting Apple +2 x 50 times). I only bought one and it serves as a permanent decoration at my Home Station.
Apple Trees, however, can also be earned as prizes during events. These are the good ones, you can (and should) harvest them as soon as you get them. However these trees must be placed at your Home Station. When you get dozens of them, it can really cramp your already limited space. The best place to harvest them is into a Botanical Garden. Both premium features synergize very well. Each Golden Apple Tree gives you +30 live energy when harvested. You need to place them at your station and click to do so.
Acquiring Apples by bartering. Here comes the heavy hitter of bartering. For some players that set Apples as their main drive, it becomes a routine travelling to Greenlee to barter for Apples there.
Greenlee is a land north from Wallmond, medium distance from your Home Station. There you can barter Quartz Sand and Tomatoes for Boxes of Apples. The flowchart is as follows:
There are some important tips about getting Boxes of Apples.
Greenlee is a relatively small land. You can squeeze vegetable complexes and harvest Tomatoes at location but keep in mind that:
a) the number of vegetable complexes will be smaller than in other lands.
b) the land will remain opened, counting towards your max number of opened lands.
c) you still need to bring Quartz Sand to Greenlee.
The game designed to make you harvest Tomatoes at Wallmond or at most Glade. However Inti Coast is twice as near Greenlee compared to Wallmond, saving half the travelling days. If you really want to let a land opened, think about Inti. You can place way more vegetable complexes there and can settle Greenlee. (or keep both opened, it’s your choice).
Quartz Sand can be acquired from adventuring. Desert lands have lot of stones that drop Quartz directly. You can also earn small amounts as prizes for doing Leontius mines. If you want in large quantities, you can make your own Quartz at Home Station, grinding Stone and Fire at Metallurgy. Stones are a somewhat harder resource to get. The amount found in lands is lower than other resources when you compare the amount of energy spent. You need Stones to make Millstones and Quartz Sand, so it’s usual to run out of it often.
Tip: you can use SWNI to get stones and also give stones. If you are at lower levels and cannot gift higher items such as Raspberries yet, sending stones helps a lot. :-)
Quartz Sand also will need to be transported to Greenlee. There is no shortcut. Even while you can save fuel or dog feed harvesting Tomatoes near Greenlee, transporting huge loads of Sand will be more expensive. Fortunately, Sand is used in smaller amounts, so you can take months between ”recharging” Greenlee with Sand.
This is the general flowchart. In red the supposed sources of Tomatoes. In Orange the source of Quartz Sand, that you must bring from your Home Station. And in yellow the delivering of Boxes of Apples.
Story time: Is all this work worth to get Apples?
I learnt that it depends of your play style. It was useful to me, but not anymore.
First you need to consider how you are harvesting Tomatoes. I found it only worth if you harvest them at Super Vegetable Complexes. Using them, for each 1 energy point invested in Tomatoes, you earn 8 back in Apples. Normal Vegetable Complexes or Hotbeds diminish the profit (in terms of Energy) so much that is really not worth. The time for harvesting tomatoes also can be cut using Fertilizers. If you come online twice during your daily gameplay, you can have around 6 (or more) harvestings, which calculates as around 50 energy per Super Vegetable Complex. 100 Complexes equals around 5.000 energy net profit per day in Apples.
During these years, my eternal hunger for more Super Vegetable Complexes (SVC) made me got over 300 of them. Not a single real life cent was spent, all of them I got from trading with other players (and a small amount using my own free Emeralds during sales week). My greed for more and more SVC’s lead me to a conundrum: I started to make so much Tomatoes that I simply could not transport them to Greenlee anymore. Tomatoes have a sled weight of 3 points. This lead to a lot, and I mean a LOT, of comings and goings. Tons of Tomatoes to be transported and a small sled to fit them. Hours repeating the same process of transporting them is just no my play style.
So I focused on increasing the size of my sled. Currently it is 12.200 points. Now I can do merely 20 or so trips (counting come and go as 1 trip) per batch of harvesting cycle. This led to another problem. Using the Airplane, my main travelling drive, costs way more Kerosene than I can get. In resume: the cost of travelling, for me at least, is greater and impacts negatively way more than the profit in energy.
This answers the question: if you are a grinding player that does not care about traveling by sled, your dogs and horses can help you earn a large profit in energy transporting goods to and from Greenlee daily. It will really help you a lot. If you are like me and dislike a repetitive gameplay, than Greenlee is not for you.
The third option is that you are a premium player, and have no problem paying for Kerosene. If that’s your case, go for it. You have the best of 2 styles. Remember that you can place SVC’s in any land, so you can have up to 15 lands filled with SVC’s producing an absurd amount of Energy. I saw one player doing over 140k energy per day this way.
And here is my Wind Song, empty because there are no more Tomatoes to be harvested…
Bartered snacks
As you can see, there is not really a hard definition of snack types, but a loosely classification of them. Now that we have covered the +1 and +2 snacks, the expected step would be to describe the +3 snack, the Dried Toast. Which is common limited and uncommon. So, I’ll wrap all together and analyse all the bartered snacks.
+3 Dried Toast
Dried Toast can be limited bartered at Windsor for Socks and Healing Grass. At Windsor you will have up to 135 Healing Grass at the end of expedition, which allows you to barter up to 27 Dried Toasts. You should not do this barter, as there is other better trade at the same location.
Dried Toast is also an uncommon snack, usually dropped bringing loot back home or at location after chopping bushes and grass. It drops in low amounts.
Tip.: I found it to mess up with the snack math a little. I use all them for harvesting, together with Fried Chanterelle. You don’t need to do this, though, just take care when reaching 40’s energy.
+5 Sausage
Sausage is a common non-renewable snack. You can barter Frogs and Fire for it at various locations: Polar-Side, Windsor and Dune at main map. You can also make it at Railroad to Dawson Sidequest maps, but it takes 5 minutes to cook each, while at lands it’s done instantly. It is also bartered at House for Two, a rare building earned during the Mazes event.
Frogs are dropped from Grass brought from locations or chopped in site.
Note: I take pity of the Frogs and never bartered them, with the exception of the quests that require it. 40 Sausages at total… Currently I have amassed 24841 Frogs which would give over 120.000 energy points. Let the Frogs be.
+5 Amulet
Rarely dropped from gifts and prizes, Amulets are limited bartered at Claw for items got in the same land. You will be able to barter around a dozen of them at most.
+5 Cappuccino
This is where all your Cinnamon will end. You can barter Cinnamon, a relatively rare drop, and coffee beans for Cappuccino at Nord-Pas, a land where you will also play some Leontius’ Mines once in a while.
+10 Meringue Do not make this barter. You can make Meringue at Rock for Cinnamon and Milk, however this consumes a lot of Cinnamon, a rare drop from various sources. It is much more profitable to barter your so rare Cinnamon for better snacks at Nord-Pas.
+10 Bowl of Soup
At Forgotten Trail, you can make Soup bartering 1 Golden Crocodile and 2 Kettle. You can make Golden Crocodiles at your Jeweller and Kettles at your Metallurgy. The raw materials are abundant (gold and iron), however it is time consuming to make and it will also have the cost of transportation. It may be a useful barter for industrialist players. You will need lots of workers to operate many Jewellers in order to get enough Crocodiles.
+15 Pancakes
Again at Windsor, you can make a limited amount of Pancakes, bartering this time Diamonds with the Healing Grass. It gives much more energy per Healing Grass and is preferred over the Dried Toast.
A better place to barter it is at Green Day. There you can barter for Pancakes with Buffalo Milk and the rare 30 carat Diamond. It continues to be very restricted, due Diamonds being very rare, but not amount limited, such as in Windsor.
+15 Mushroom Soup
You can barter this Soup at Utopia for Peafowl Eggs and Porcino. It is limited to the amount of Porcino (a type of mushroom) you encounter during your adventures at the lands in the location. But Porcino is really a rare drop. After completing that part of Map, I got only 494 Porcino, enough to make 98 Soups. Following this numbers, you will be able to make around 100 Mushroom Soups.
+20 Lava Cake
You can barter Lava Cake at Forest Rock for 5 Golden Eagles and 1 Pudding. Again, this type of barter falls in a similar chain of production as the Bowl of Soup. It is easier to make Pudding, but you will need 5 times more workers to output enough Golden Eagles. Also, remember the costs of transportation.
+20 Pie
At Windsor, you can barter Healing Grass for Pies. Don’t do this barter, it is a waste of resources.
At Amber and Weather Station, you can barter Amber and some energy for Pies. Don’t do this barter. Amber is very limited. After completing that part of the map, I got 35 Amber in total.
+40 Flower Decoction
At Iron Valley, you can barter all Dried Flowers you earn along the northernmost part of the map and Red Extract for Flower Decoctions. It is limited, but more abundant than the other limited barters. In my gameplay, I found:
1370 Dried Flowers at Iron Valley
1595 Dried Flowers at Goldberry
270 Dried Flowers at Skylight
1000 Dried Flowers at Stoneswick
1550 Dried Flowers at Crystallium
4550 Dried Flowers at Northern Plateau
+40 Mint Tea
Not to be confused with Tea made at Tea Shop, Mint Tea is bartered at Wallbridge for Cups and Mint. Mint is a limited drop from this land. In my gameplay, I got 373, enough to make 24 Mint Tea. Following this, you will be able to barter around 25 Mint Tea at his location.
Note: Both Mint Tea and Flower Decoction are also uncommon rewards from various gifts and prizes. You will keep encountering them. Prefer to use them, saving your own Raspberry Chimes.
+50 Blueberry Pie.
It can be bartered at Amber and Weather Station, again for the limited Amber. You may do this barter, however Amber is very limited. After completing that part of the map, I got 35 Amber in total. So, you may make 7 Blueberry Pies in total.
+60 Mel de Lavanda
It can be bartered at Northern Plateau for Dried Flowers and Secret Mixture. In total, the game will allow you to make 344 of them (20.640 energy).
Honey, Honey, Honey. And Scalp.
Honey snacks are by far the most dropped snack from your adventures. They can also be bartered at Scalp, with a catch.
Tip.: You should chop down Trees first in any land you go. Trees, regardless their size, will drop both Wooden Boxes and Bird Nests. This loot will drop Honey Snacks when brought to your Home Station, especially Wooden Boxes. This will help you save your former snacks, consuming that the land itself gives you. They will not be enough to clear the land, but will help you manage energy when you are running out of snacks.
Never barter for +5 Honey, even if you already have SVC’s. In order to make this barter, you need Ribbon, which is made from Fabric and Beets. Fabric also needs Cotton as primary material. The point is both Cotton and Beets will need energy to be harvested. Let’s do the math: +5 Honey Snack needs +3 Ribbons. At Manufactures, 10 Ribbons need 100 Beets and 10 Fabrics, which need 10 Cables and 10 Cotton Threads, which need 80 Cottons. Using SVC’s you get a profit of +14 crops for each energy point invested. In order to get 180 units of crops, you need to invest 13 energy points using SVC’s. To barter 10 times for +5 Honey (50 energy points in total), you need 30 Ribbons, for which you invest 39 energy points and a lot of time. It is really not worth all this trouble, unless you are getting rid of surplus. Your SVC’s should be aimed towards Rye and Tomatoes. The barter at Greenlee is way more profitable energy wise.
Also, if you don’t have SVC’s the net energy gain will be negative: you will invest more energy than what you get in return!
The +10 and +15 Honeys are non-renewable barters. You need White Gold pieces, the Wolf and the Clock to barter. They don’t drop so often. After all these years, I have 802 Wolves and 2649 Clocks (I never bartered them). You will need Bird Boxes, that you can make at Ukhty. These two are normal uncommon barters that just don’t occur so often.
Note: In short, even though Scalp seems to be a good land for getting snacks at first glance, it is a scam. Everything there is a scam! Just like Mengu! All barters at Scalp are ridiculously expensive. Only barter there what is strictly required to do quests, and be prepared to be shamelessly robbed by locals.
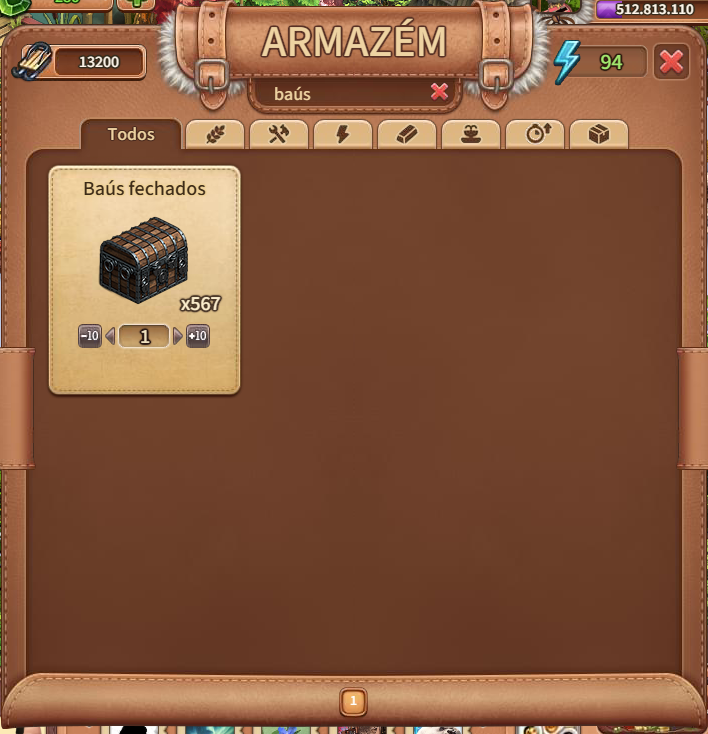
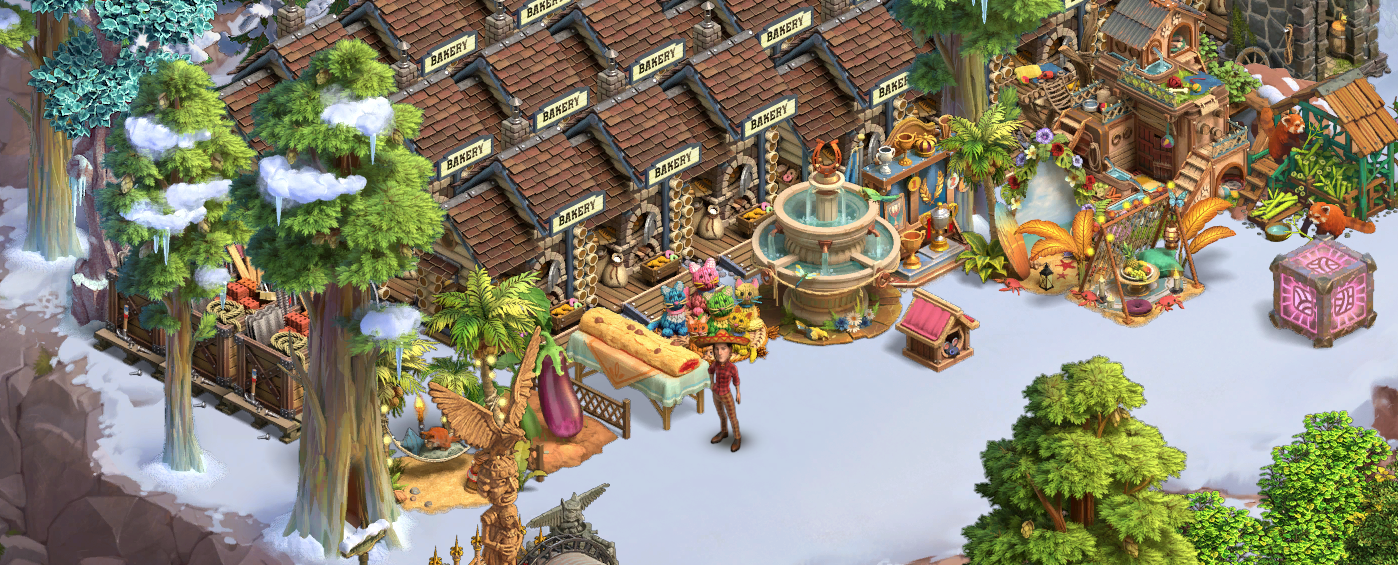
Bakeries: in-depth guide.
Here is where you dump Raspberries and Chocolate. They are free to be gifted and valuable for trading.
Now that we have the notion of how important snacks are, it’s time to think about making them on our own. Besides bartering them in other lands, you can produce them yourself at your Home Station. That’s what Bakeries are for: a building dedicated to make Snacks, or in other words, to produce Energy. Managing them is the main core of the gameplay, it is what allows you to progress.
Unfortunately, the game itself does not properly explain to new players the huge importance to invest in Bakeries. There is no tutorial, quest or any indicative that they are a must for proper gameplay. Because of this, too many new players simply give up the game because they lack energy to progress. It is a shame. If I were part of the staff of developers, I would make all new players start the game with 1 Bakery, so they will know what to expect and figure out the progress. This would prevent so many people simply vanishing after reaching a certain level.
But let’s stop digressing: we need to work with what is given to us. So, new player, listen up:
1 – Bakeries are a must for proper gameplay. Even though you can play only with energy snacks earned during gameplay and secondary energy sources, it will make your progress too slow to be enjoyable. You will also be unable to complete any land within a time limit.
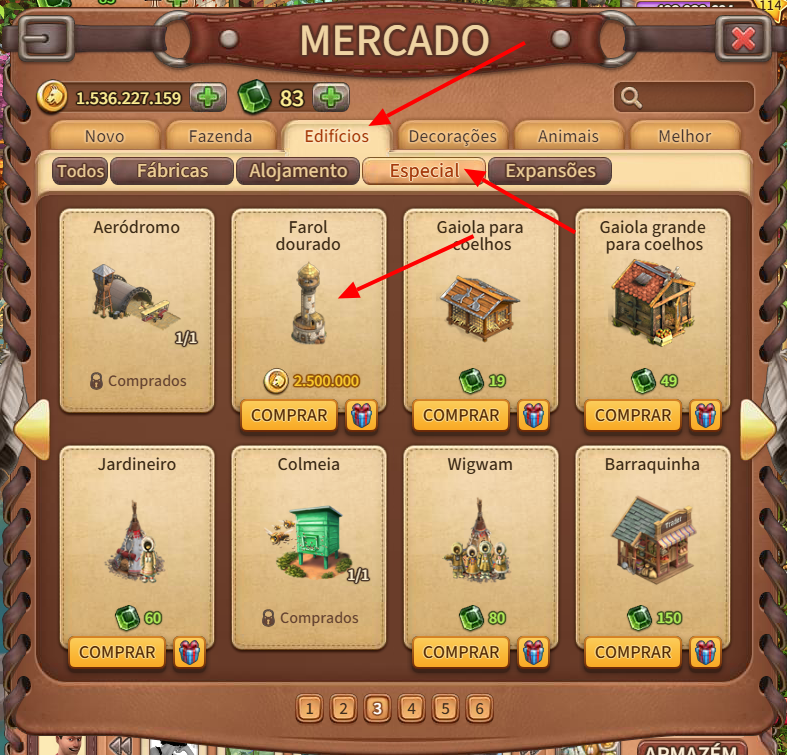
2 – Bakeries are Premium items. They never sell for Dog Coins, only for Emeralds. They usually cost 70 Emeralds, but thrice a year the Sales Week occurs, where you can buy them for 49 Emeralds. I suggest you have patience and wait. This bargain is really worth the waiting. You buy them at Market (see User Interface Guide for more info) just like any other available item. Once bought, you need to place it immediately in your Home Station. You cannot store it.
Tip: All new players start the game with Emerald Bonuses. They really should save these Emeralds for Bakeries (and/or the Modern Sled).
Outside Sales Week, you will find the Bakery at the second page of “Buildings”, at Market. You can buy it to yourself or gift it to another player.
Note: Mini-Bakeries are both Premium items or earned as prizes during certain events, such as Mazes. I suggest to never buy them with Emeralds and earn them for free during Events. But I never liked them. Mini-Bakeries do not have all recipes, making at most the Cheesecake +35. Whoever has them, usually sets them only to produce Flour.
Using your own Emeralds is not the only way to get Bakeries. Out of my 45 Bakeries, 40 were acquired through trading. You can (and should) look for other players trading them for resources. My first Bakery was traded for 30.000 Chicken Eggs. Lots were traded for Chocolate, Raspberries, Super Vegetable Complexes etc. Emeralds are the fastest way to acquire Bakeries, but never forget you can trade for them. If you don’t have a Trading Stall, make announcements using the daily messages (see Gifting Interface for more info), placing your bids. After Trading, or receiving it as a gift from other (generous) player, the Bakery’s blueprint will stay at your Home Station’s Storage. Just click and place it.
Building and using a Bakery.
Nothing in Klondike is balanced. Bakeries would not be an exception. Not only you need to acquire them, you will also need to build them.
The blueprint you placed on the ground will require 3 stages for building completion. You should use resources from your Storage. Even though you have the option to pay more Emeralds for the materials required, such choice would make the costs too high. Acquiring these resources can be done by many means, such as producing yourself, receiving them as gifts from other players, trading them or getting from game gifts. These materials are hard to get as a new player, but mid game onwards you’ll be making tons of them. Right now you will need lots and lots of cotton, and also a long time to produce enough Kettles.
The resources needed are
Stage 1: 15 x Bricks + 10 x Iron + 5 x Fabric
Stage 2: 10 x Glue + 5 x Buffet + 5 x Plaid Throw
Stage 3: 15 x Kettle + 5 x Jug + 10 x Window
Even after building the Bakery, some recipes are locked, and you will need to unlock them to produce goods. You can unlock them paying Emeralds or bartering the required items. Once unlocked in one Bakery, it is available in all of them (you unlock a recipe only once).
Note: I always, in every situation, suggest to barter. The Emerald price for materials and to unlock recipes is outrageously expensive for new players. Later in game, you’ll have so many free Emeralds that these unlocks become cheap, but for now have patience and make the effort for bartering.
Bakeries are the last stage in a complex chain of production. You need resources to make Snacks and you need Snacks to have Energy to get resources. Just like a rusty engine, only after some work it will run smoothly. After this, you’ll be able to “set and forget”, so you can enjoy gameplay.
A completed Bakery allows you to produce your own Snacks. They work exactly as any other productive building. The materials and finished products are made in stages. Just as you made Pipes > Buckets> Mugs > Kettles, each stage for the Snacks takes some time and managing this time is part of the gameplay. Let’s see the example of the Raspberry Chime: Short Crust Pastry (2h) > Curd Base (30min) > Chime (4h). You can see the full Flowchart of the main Snacks in the section dedicated to the snacks themselves above.
Now that you have a Bakery, your main concern is to get enough raw materials to keep the production running non-stop. These main resources are Clay (to make Containers), Buttermilk (to make Curd Cheese), Stones (to make Millstones) and Rye (to make Flour).
Tip: You will always need to keep going to lands to get more Stones and Clay. In any case of shortage, remember you can always ask for Clay and Stones as a Daily Gift (see Gift Interface for more info). Also, if you don’t currently have animal feed (Porridge, Fish) or fuel (Kerosene), just wait for events, such as Mazes or Tiger Mines. They have lots of stones and clay and will not require travelling.
–
Tip: You need Buttermilk to make Buttermilk. Your first Buttermilk may come from a neighbour or from a game gift. In order to avoid getting stuck, keep some Buttermilk and Milk stored at any other land, such as Wind Song or Indigo. So if you ever run out of Buttermilk, you can restart its production.
Bakery management
As you continue you gameplay, you will eventually amass more and more Bakeries. High level players, usually have what I call ”an ocean” of Bakeries. As their number increases, it becomes tiresome to set them up every day, multiple times a day. So, I once suggested Klondike’s developers about some sort of Bakery management. They are very open to suggestions, discuss their games and to talk to players. Vizor’s staff is very approachable and eager to help us. However we all should share our ideas in the News page, saving the Support channel for more important issues, such as billing and payments.
As they told me in the News page, Bakeries were designed to be as they are, so there will be no sort of in-game Bakery Management. Also, there will never be some sort of “Bakery Manager” with “Bakery Engines”, in a similar fashion as the Roulette Manager. They must be set and managed manually; individually. They are designed that way so the number of Snacks a player produces daily is limited by the amount of both resources and space in their Home Station. As I stated before, it becomes tiresome to set one by one. That’s why I use mouse macros. They work very fast, so I can set up all 45 Bakeries (or over 100 Vegetable Complexes) in less than 10 seconds.
Note: Mouse Macros are programs that repeat mouse movement and mouse clicking for you. I use 2 programs: The Free Mouse Auto Clicker and the Mini Mouse Macro. You can and should learn about Mouse Macros to better use a PC. They save time and prevent tendon damage due repetitive tasks. If you are not computer savvy, don’t worry, these things are not required in any way to play and enjoy Klondike. But I have lesions in both my hands due previous intensive computer usage. Health should always come first, so I always incentive people to learn Mouse/Keyboard Macros, including during their leisure time.
The interface of both programs.
In action:
Klondike – The Lost Expedition: Setting 45 Bakeries in less than 30 seconds
How to set up your Bakeries
During my gaming experience, I tried many strategies. I suggest you to discover them for yourself, try different things. Each player has a different play style, different preferences. If you can only play for a short time, perhaps putting them all in loop would be better, so you can collect their output once a day. As I play longer sessions, I follow this routine:
1 – I use only Wind Song’s Windmill to produce Flour. After completing the permanent land Wind Song, you will receive its Windmill as a prize. You can locate this Windmill in your Home Station’s Storage. This building is able to produce Flour using much less resources than the Bakeries. Hourly it will output 30 Flour units. The longer you stay online, the more Bakeries it can sustain.
2 – I produce Gogle Mogles in batches. After emptying my reserves, I set up hundreds of Tribal Chickens and Purebred Cows. With their Eggs and Milk, I set up all Bakeries to make more Gogle Mogle until I run out of raw materials (Eggs should run out first). Then I completely forget about Gogle Mogle for months. I found this way to be easier for me then producing ”by demand”.
3 – I have 4 Manufactories producing Containers (3h). They are enough for the amount of Curd Cheese (1h) output daily by 2 Milk Plants. I have other 3 Milk Plants to produce Buttermilk (2h30min). All this production is non-stop and this proportion of factories takes in account the time needed to produce the items and the amount for each barter. This set up is balanced to take a longer time until shortages.
4 – As I set all the Bakeries together, I prefer to set the production of equal items. My daily schedule is:
At noon (12h): I set all Bakeries to produce Short Crust Pastry. This whole work will take 6h.
At 20h: I set all Bakeries to produce Curd Base. This whole work will take 1h30min.
Before sleep: I set all Bakeries to produce Raspberry Chimes. This whole work will take 12 hours, so I let them overnight.
This way I can output 135 Raspberry Chimes per day (5.400 stored Energy).
Tip: Always check your employees remaining time before setting the Bakeries, especially overnight. The game will not warn you if their contract will end during the production. If it happens, regardless the time they spent making the snack, all production will be lost and you will need to restart the timers all over again (no materials are lost, but you will have a bad surprise next day…).
5 – Whenever I want to make Blueberry Pies, I set up 2 or 3 Bakeries separately solely for this purpose. This way, my main schedule is not affected and the output of Chimes takes a minor loss. I usually prefer to do it when I’m experiencing shortages of Flour. In this case, I produce a whole batch of Chocolate Cream, again, until the raw materials run out. Then the same with Blueberry Cream. Once I can restart normal production, I set 1 or 2 Bakeries to output Blueberry Pies along while the others keep making Chimes.
I’m not a fan of Blueberry Pies. They take a lot to make and, mess up with my daily routine and once you master the proper technique to finish large objects, they are not that important anymore (unless you are following the “Apple path” – See Apple Guide for more info). This is what I’ll discuss next section.
Large objects (+95 and beyond). How to chop them down without ever needing a Partner?
Here I am, writing a guide for an online game, while I should be finishing my course about compliance in public processes (I’m a civil servant/government employee). Have you payed your taxes yet?
Except for Blue Peaks Valley (the starting zone), lands in Klondike usually range between 40.000 to 60.000 energy points for full clearance. These points are divided amongst small, medium and large objects. It is very important to note that the land’s clearance percentage is not linked to the amount of energy spent, but to the raw number of objects chopped down.
Let’s say a land has 1.000 objects. Chopping down 10 objects, regardless of their size, will count as 1%. It means that an object of size 2 and an object of size 300 will count exactly the same for clearing percentages.
That moment when a man must face mountains. And in Klondike, they value as much as a peeble for clearing percentages… :-/
So, in order to get the 50% and 70% clearing rewards, you can just ignore the large objects. If necessary, chop down only the smaller ones of them (ranging from 95 to 120 points). Save your secondary sources of energy for when the completion prizes are worth the effort.
Tip: Rubble usually can be sold for 50 Dog Coins each. Clearing them are not required to completion. Lormuth has a lot of them — one (1) of them is unreachable.
—
Note: Clearing 100% of the permanent lands yields unique useful prizes unavailable elsewhere. It is highly adviseable to always finish 100% of a land before settling it.
—
Note: Clearing 100% of update lands is never required, but it yields great prizes, specially spinners and Roulette Engines. These Engines usually cost 50 Emeralds when rarely sold by NPC’s. I suggest to check the community site KlondikeFans.com to decide if the week’s spinner is worth the challenge.
—
Note: Even after clearing 100%, there can be still more to do! Some special objects in permanent lands can only be removed with dynamite. For exemple, Wind Song has Rocks and Indigo has Lakes that, once exploded, give resources and special loot. Whenever a land has a special object that you cannot click, try a dynamite for suprise loot! (If not, the game will warn you and won’t let you waste the dynamite).
In the previous section, we studied how to clear all small and medium objects in any land. By doing this, you left behind lots and lots or large objects. In this section we’ll see how to remove them too, clearing 100% of the land.
You know about the two main sources of energy in Klondike: natural replenishment and Energy Snacks. You’ve learnt how to juggle Snacks and have up to 93 Energy Points available in your Energy Bar. However you also should have noticed that you cannot eat more than your stomach can hold (both in real life and in game). If you try to eat another snack when your energy bar is filled or overfilled, you will receive the following message:
Consuming the snacks made at your normal Bakeries, you can add at most 50 Energy Points for immediate use. With your Energy Bar at 43 points, you can and eat a Blueberry Pie (+50), maxing out at 93 energy points. It is enough to chop down most objects of the lands in your journey and earn the great prizes granted at 50% or 70% of clearing completion. But to really clear 100% of a land, you need to go way beyond that 93 limit.
You have three routes to achieve this. The first is to rely on a partner AND PLAY PROPERLY with them. The second is to reach thousands of energy points. The third is the Premium way: just nuke the whole thing.
The Partnership method
Playing with a Partner is the easiest way to clear 100% of a land. Well, as long as you and your Partner don’t mess up. As explained in the Partnership section before, each time you chop down an object you earn Gold Pickaxes. They are not random, and are earned following the amount of energy spent to chop down any object. Their limit is 300 points, which can be used to chop down things at your Partner’s lands. You don’t earn your Partner’s loot, but with mutual help, both can clear huge objects.
The proper method to play this way it to keep talking to your partner constantly, preferrerably outside the game itself. Using messengers, chats, Discord, Facebook or any other media of your choice. You and your partner must be playing at the same time, clearing the same land together. This way, you can inform them the moment you have enough Golden Pickaxes points, which usually happens very fast. The gameplay is as follows:
1) Both of you start the same new land. Usually, each land is divided in sections, forcing you to follow the quest line in order to proceed to the next section. You can use this feature to guide your next steps. E.g., both of you can commit on clearing all small and medium objects of a section before starting a new one.
2) Chop down objects until you reach a certain amount of points (from 95 to 165) and stop right there. Inform your partner that you are ready for removing a large object in their land. In the meantime, they should be doing the same.
3) When both are ready, mark the objects sized from 95 to 300 and clear each other’s ones.
4) Repeat the process until 100% completion.
To play this way, both Partners must be able to produce enough Energy Snacks to keep up the same pace. As in any real life partnership, you must go together. If one stays behind, it will hinder all gameplay for the other.
Tip: avoid reaching 300 points. Any excess Golden Pickaxes will be lost. As usually the highest object is the 165 Clay Pile, whenever you reach 165 points, inform your Partner that you can clear one of their 165 objects.
—
Tip: yes, there are special cases when you will find massive objects ranging from 200 to 300 points. In these cases, the land itself usually gives dynamites to explode them.
Even though this is the most straightforward way to 100% clear a land, I find it too troublesome. You depend on another person, must set a schedule to play together, and must agree upon a pace… Unless you are playing together with a sibling at home, communications becomes tiresome. I prefer to just pump up my Energy reserves for thousands of points.
Pumping Up Energy.
This is what you came here for, isn’t it?
When it is time to clear a land 100%, I prefer to use the Secondary Sources of Energy to pump up my reserves. These secondary sources are a subject of their own and I’ll discuss detailed each one of them in a future section. Using them you can reach up thousands of Energy Points available in you Energy Bar. However, it is in itself a trap.
Note: even though there is a limit of energy you can amass by eating snacks (as of this text, 563 points), there is no limitation for Live Energy (Blue Thunderbolt Icon) and other secondary sources. You can hold tens of thousands of Energy Points.
These thousands Energy Points certainly look to be very much because you are usually stuck in a range always bellow 100, but, believe me, they are not that much. Sometimes, they are not even enough. If you start chopping down objects directly after pumping up, you’ll spend up all your energy after only 15, 20 large objects. (20 x 165 = 3.300)
You need to strategically use this energy, extract the most of it! The correct way to use it is to never chop down large objects at once, but in two steps. In the first step, you decrease the total points of various large objects. This way you make them manageable within your normal energy reach. Only after your use all your surplus of energy (anything beyond 43) you go back to these partially chopped down large objects and finish them with snacks, just as you would do with medium objects.
Step by step – the proper method to play this way is:
1) Play the land normally. However, don’t bring the Energy Givers (Secondary Source, covered next section) back home. You can, and should, bring back all other loot, such as Boxes, Wood, Nests etc, as they drop Energy Snacks when brought home. As long as the Energy Givers remain there, it’s fine.
Tip: When collecting the loot in any land, just unload everything into its local storage. Them, from the storage, you reload your sled. These two steps allow you to clearly select what goes back home each trip.
—
Tip: To reorder items in your storage (both lands and at home), you can load and unload your sled. Rearranging items’ order makes easier to search for them in other lands, as their storages have no search mechanism.
Regardless of how you do it, as long as the Energy Givers remain in the land until the right time to bring them home, it’s fine.
2) Once you finish all the small and medium objects (and, at this point, the land’s storyline), it’s time to pump up.
a) The first thing to do is to max out your normal energy consuming snacks. Considering the Special Snacks (+100) made at Tasteland or Heartwood, you can increase your Energy up to 143 points (163 if you subscribed to Unicorn Club).
b) Utilize all other Secondary Sources to increase your energy level the most you can.
c) Finally bring back home the Energy Givers.
3) Now you need to PROPERLY use these points. Do not waste them chopping down the objects directly. The proper way to use this surplus of energy is to DECREASE the points of large objects, so you can finish it with Energy Snacks.
Let me explain in other words. As you can normally reach energy levels of 80~93 eating snacks, each time you chop large objects down directly, there is a waste of 80~93 points gained from Secondary Sources.
The proper method to play this way is to turn off you combo chop. Do you remember that you don’t need to chop down the object entirely? You can chop only a part of it! When turned off, you can define exactly the amount of energy you will spend each time.
Click and hold, or click multiple times on an object to define the amount of Energy Points you will use. You can use as many points as you currently have in your Energy Bar. Once decreased the desired amount, start another object.
Examples for objects size 95:
– Chopping down 2 points, it drops to size 93. You can finish it later with normal energy 43 +50 Blueberry Pie.
– Chopping down 5 points, it drops to size 90. You can finish it later with normal energy 40 +50 Blueberry Pie.
– Chopping down 12 points, it drops to size 83. You can finish it later with normal energy 43 +40 Raspberry Chime.
– Chopping down 15 points, it drops to size 80. You can finish it later with normal energy 40 +40 Raspberry Chime.
See? It all depends on the amount of Raspberry Chimes and Blueberry Pies (and any other Special Snacks) you have in your stock. Use the same approach to any other Large Object. Chop down part of it, thinking further on the amount of energy needed to finish it off with snacks. If you prefer to maximize the efficiency of the Pump, you should focus on making more Blueberry Pies.
For 95> remove 2 ; For 100> remove 7 ; For 120> remove 17
For the larger ones (150 and 165), I suggest to use Dynamites of 100. They are very easy to get and you wouldn’t use 47 and 72 Energy respectively. For intermediary (130 and 140), analyse your current energy surplus.
I personally dislike doing these math calculations during playtime. I just chop every one of them down to 80~90. It consumes much more Energy, but I don’t need to rely on Plums and Apples to get +3 energy.
After your surplus of energy runs out, you can turn on the combo chop and finish off all objects you decreased. Repeat the Pump as many times as necessary, using Secondary Sources and the newer Energy Givers dropped during this second phase. This process of clearing a land will take some days to finish, as your Secondary Sources have daily limits of use. But this is method that you can do by yourself, taking your own time, and following your own pace.
Tip.: Always start with the (+120) Iron, (+100) Coal and (+95) Clay sources. They will drop Energy Givers, which will allow you to redo the Pump, even though in small amounts.
—
Tip: The land itself may have Secondary Sources. Wild Rye, Dead Trees, Chests, Trunks, Special Gifts and any other collectibles should be collected only when finishing the land, as they will drop Live Energy. Use them to increase your Pump.
Leontius’ Way
Nuke time. (Seriously, in one of the Railroad Side Quests, Leontius made a nuke…
I play the game since Leontius was ”a very dangerous man” who went crazy during the Gold Rush. And didn’t have a goatee… Later, he was retconned to be just a friendly guy who happens to love Dynamites and is infatuated to Sophia Bellami, a walking Red Flag.
Premium players can buy Dynamites to remove Large Objects. These Dynamites may cost several Emeralds or may come as a bonus for a purchase. The amount of money you want to spend in the game is up to you. Just take care.
Note: Since I started writing this page, I made 2 purchases (Construction Trust). The more you play, the easier Emeralds come by. I amassed a total of 500 FREE Emeralds in a few months and dumped them all to buy Roulette Engines. In total, I spent a total of USD$ 20,00 in this game, playing since 2023. Not so bad deal…
I confess I would like to have money enough to buy lots of Dynamites and just explode the whole place. All my Dynamites, however, are free earned. They are enough to help me finish the lands, using the Pumping “technique”. I use them to finish the +150, +165 and larger objects, decreasing their size and then finish off them with snacks.
Tip.: Once you finish the main storyline, you’ll be able to make your own Dynamites! Dynamites +100 are more manageable, as you can select exactly what Object they will decrease. Dynamites +250 are cheaper to make, but may destroy unwanted objects together. Choose wisely!
Next section we’ll see the Secondary Sources of Energy. I believe it will wrap the Energy Guide. Then, we will proceed to learn a little more about Harvesting. It is still a Farming game, remember?
3.4 Secondary sources of Energy
There are many other sources of energy besides natural replenishment or snacks in Klondike. Even though they are not important for Farming (and preferably should not be used to Farming at all), they are extremely valuable to clear 100% of lands, may them be permanent lands or not.
All of these secondary sources have some limitations. It means you cannot use them more than “once a day”, or “every 12 hours”. Also, they can even have a limited amount of uses per day or limited total times to be used.
Regardless the type, remember that these secondary sources should be used only when you need to have more than 93 Energy Points available for immediate use. As explained before, it would be a waste to use them in any other application. Let’s explore them.
Neighbours
The very first secondary source available to you is your Neighbourhood. When visiting neighbours you can dig objects at their stations, open up their treasure hides or collect Egg Nests their birds laid around. Visit your Neighbours often to get your daily energy pump!
Note: Very important to stress that you cannot ”steal” things at your Neighbour’s Station, nor your things can be ”stolen” in anyway. All your eggs and treasures are safe, so are theirs.
—
Note: Your neighbour must be an active player. If your neighbour has not entered the game recently, you may not be able to dig at their Home Station for free.
Digging at your Neighbour’s Station will always grant something. Experience, Dog Coins, raw materials and rarely you may find a Gold Vein. When you find it, multiple diggings at the same object will drop valuable loot.
Collecting Hides and Gold veins requires that you Neighbour does not ”follow you”. It means that you need to hire them to work at your station. They don’t need to work, though, only to be hired. After hiring, their Avatar will disappear and you will be able to collect the treasures.
Tip: Keep at least 1 Tent, the very first Housing you’ve built. Whenever you find a Gold Vein or a Hide, hire that neighbour for just 35 minutes. After collecting the treasures, you can immediately fire them. Besides being the cheapest option, you will always have a spot available for hiring.
Always vacant, waiting for a fast hire/fire action!
I experimented on how to manually find a Gold Vein. I concluded that it’s just random. It is not tied to an specific object but it seems to be tied to the number of different objects you dug.
1) Once you find a Gold Vein, if you exit that Station and come back, the Gold Vein will not trigger again.
2) Once an object is dug the first time, if it does not trigger the Gold Vein at the very first digging, it will not trigger it no matter how many times you dig it again at the same day.
3) The best way to trigger a Gold Vein is to dig 5 different objects in each Neighbour until it appears.
4) You can find more than 1 Gold Vein in a day, but never in the same Neighbour in the same day.
With this fast explanation aside, let’s come back to the issue on point: Energy. Digging certain objects at you neighbour have a chance to drop 1 Live Energy. Benches, Fences, Beehives etc. However, in my gameplay I found the easiest way to get Energy is to dig at their Barns.
Tip: As the Barn is a fundamental building, every player MUST have at least 1 Barn at their Stations. Digging only objects that drop Live Energy will increase the chance to get it! In doubt: dig the Barn!
Shovels and Digging
In order to dig, you need Shovels. There are 3 types of Shovels: Free Shovels, Golden Shovels and Mega-Shovels. They are held at your Storage but you don’t need to keep track of them. Whenever you enter a Neighbour’s Station, it will show the amount of each type of Shovels you have.
Free Shovels
Every day, will receive 5 Free Shovels for each Neighbour. They do not add up. If you don’t use them, they will just disappear, so, the next day, it will be only 5 free units again to be used for each Neighbour. You can use at most 300 of Free Shovels per day (60 Neighbours if you use all 5 in each one).
Golden Shovels
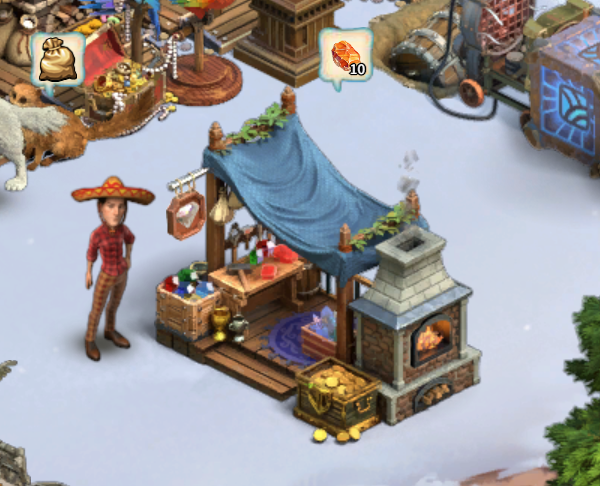
Here you can see both the Lighthouse and the Beehive
The lighthouse comes fully built. Once placed, you can start bartering materials for Shovels. This is the main use for Cherries harvested from Cherry Trees.
Digging at Barns have around 1/6 chance of dropping Live Energy. 300 Diggings will drop around 40~55 Energy. However, you can dig 1.000 more times each day. To do that, you consume Golden Shovels. You can make more of these Shovels at your Lighthouse or exchanging the Lucky Set for them.
Using both Free and Golden Shovels, you can dig up to 1.300 times each day. As each digging takes 1 second, the total time is roughly 20 minutes.
Tip: Raising Penguins is the best cost/benefit source of Golden Shovels.
Mega-Shovels
All this excavation for energy has a soft limit. Each Station can be dug at most 300 times per day (sum of all players that dug there, you included). You too have a personal daily limit of 1.300 diggings you can use around your Neighbourhood. However you can overcome this limitation with the premium option of Mega-Shovels.
Paid with Emeralds, you can continue digging as long as your wallet allows you. In my experience, the drop rate of treasures and Energy is the same. The sole purpose of Mega-Shovels is to allow you dig even more.
Tip: Don’t buy Mega-Shovels. They are just too expensive with too little benefit. They come every so often in Prizes, so you will always have some of them. Save your Emeralds for Bakeries and the Modern Sled.
Patrol Dog and Hides and Egg Nests and Golden Veins
A treasure indeed.
Digging is not the only source of energy. In fact, the most valuable source of Energy in your neighbourhood are the Hides. Whenever you remove a large object at your own Home Station, may it be a stone or a tree, a Hide will appear in the place it was. When you open it, you receive collections, some materials, Dog Coins and Live Energy. The larger the original object cut, the more energy from that Hide will be returned.
As your Hides can be opened by other players, you can open their Hides too. Only 2 players can open any given Hide: the owner himself and the first lucky neighbour! Both will receive the same rewards. As there is a limit of 20 Hides you can open in each Station per day, if you find a station with lots of Hides, you should open the larger ones first.
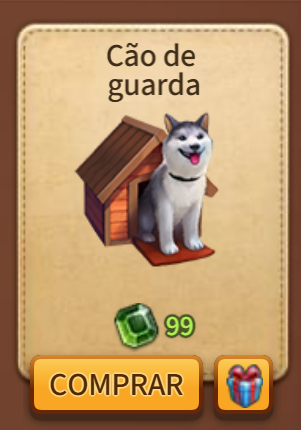
Sometimes the Hides are, well, hidden behind other objects. It’s the job of the Patrol Dog to find them for you. The Patrol Dog is a Premium Object bought at the Market that helps you find hidden Egg Nests, Hides and the Golden Vein.
Using doggo
Good boy.
A Patrol Dog helps you find collectibles at your neighbour’s stations, specially Gold Veins. He will indicate if there is a vein there and it’s exact location. He will also point where Hides are hidden and indicate where Bird Nests are. He will not collect them for you, only indicate the position, helping finding things otherwise hard to see.
You buy him at the Market. Once placed at your station, he will follow you around the section his house is set. Whenever you visit a Neighbour, he will follow too.
Clicking him will open the options to choose what he will sniff next. You need to pay Treats for his service. They are usually earned as rewards and this amount is enough for normal use. If you plan to use him more often, you can easily barter Peafowl Eggs for more Treats at your Cottage.
Beehive
The Beehive also drops Live Energy when dug.
The Beehive is a must have Premium Object. It will be the very first discount offer you receive when making a new account and, most probably you will be able to purchase it with the Free Emeralds already received. It’s functioning is very simple and explained in the building’s tip itself:
1) Place a Flower so the Bees can harvest it. Normal flowers take 5 hours of harvesting, Premium flowers take 3 hours.
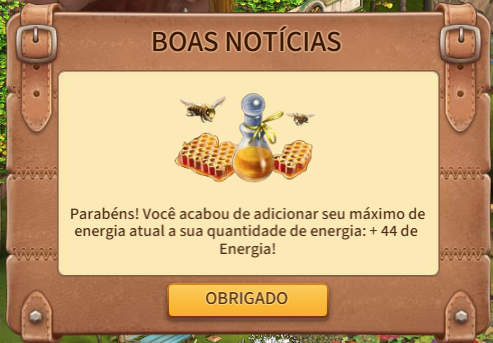
2) After 5 harvestings, the Beehive will offer you a Honey Pot. Eating it will give you energy in the same amount of your max energy.
Note: If your energy is 30, the Honey Pot will give you 30 live energy. If your energy is 44, it will give 44.
—
Tip: Eating the Honey Pot should always be your very first Pumping of energy. If there is a Honey Pot available, the Bees will stop harvesting until it’s consumed. There is no point in letting the Bees idling.
—
Tip: Place the Beehive near your entrance, so you can immediately see if the completion work icon is active.
Placing one patch of grass near the Beehive helps juggling energy. As a secondary source of energy, the Beehive should be used after you reached 93 energy points. But what should you do when you already have 44 energy points when the Honey Pot is ready? Simple: Click once in the patch of grass you placed near the Beehive (or anywhere else in you station), consume a Blueberry Pie, and then you use the Honey Pot bonus. You can also have a (Super) Vegetable Complex and collect a single output, in order to drop your energy points by 1.
You can have only one (1) Beehive. It cannot be gifted or traded.
Energy Givers.
As explained in the previous section, some loot give Live Energy when unloaded at your Home Station. They are Clay, Dry Twigs, Coal, Iron Ore, Old Trunks and Golden Treasures (in this order of magnitude). Bringing them home together in large batches helps Pumping with a lot of live energy each batch.
You also don’t need to bring all of them to your Home Station. Remember you can use other lands’ Storages to unload some of them. Keeping them apart helps when you need a larger boost and the land you are working in doesn’t have it. The more you accumulate, the more you can Pump. In my case, I use Indigo (the nearest permanent land) to keep my surplus of Energy Givers. I use them when working in lands that share the storage with my Home Station.
For example, Mazes, Tiger Mines and Story Adventures share the Storage of your Home Station. Therefore, you cannot use their own Energy Givers at the end to help Pumping up energy. As I store Energy givers at Indigo, I can bring them for the Pump at my own discretion.
Note: the large piece of Coal (65Kg) does not yield Live Energy.
—
Note: Old Trunks are earned when completing Team Events.
Este slideshow necessita de JavaScript.
Now I’ll talk about secondary sources of energy that require rare resources, which are seldom found in events. Even though they yield energy, you will not be able to use them very often, so you cannot rely on them to finish any job. They are mentioned here merely as hints. Also, you may find other sources along the way. This is not a closed guide.
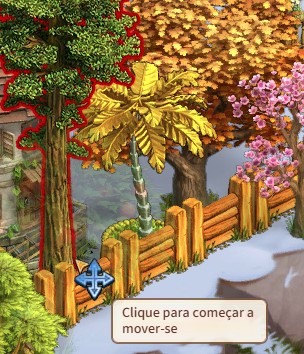
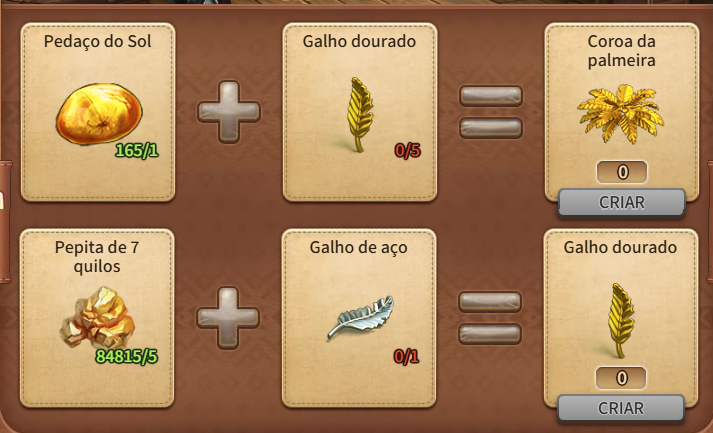
Golden Palm
My Golden Palm as a permanent decoration.
The Golden Palm is an object you’ll be able to create after a quest automatically triggers for your character. I’ll not cover the quest itself as it is already covered in many other sites (check https://www.klondikefans.com/faq-buffs-energy/golden-palm for example).
Be warned: the amount of energy you spend building the Golden Palm is higher than the amount of energy you receive back. The difference in energy surplus is given back as a large amount of raw resources. The purpose of the Golden Palm is not to “store” live energy, but help you with the Pump explained previously. It is also the only way for a player to create new Hides at their Home Station. So, the Golden Palm helps not only the player himself but also a lucky neighbour that checks his station while the Hide is still available.
The golden Palm is a somewhat hard item to make. It needs a Piece of the Sun and specifically 25 250-ounces Gold Nuggets. While you can make the Gold Nuggets from smaller Nuggets at the Jeweller’s Workshop, the Piece of the Sun is rarely awarded as prizes from Land’s quests and Events.
I personally have made only 2 after all these years. One to fulfil its own questline and other to serve as a permanent decoration at my Home Station. I found the steps to fabricate every piece of its components very annoying (I dislike repetition – check the Apple harvesting section!). But if you have patience to build lots of Golden Palms, you can amass a very large amount of energy and resources in a single go!
You’ll need 25 Gold Nuggets and 1 Piece of Sun to make 1 Golden Palm.
Locked Boxes and Locked Barrels
These Boxes and Barrels are awarded as you complete percentages of cleaning each one of the 10 Lands at Tiger Mines. Each Box or Barrel once opened yields 10 live energy. So, 15 of them in any combination will give you 150 live energy points. The only difference between them is the raw resources they output once opened.
You need Crowbars to open them and you get all Crowbars needed from the Tiger Mines Event itself. (They come with the clearing prizes.)You need to clear 100% of each land though. Clearing 100% of 10 lands gives you the exact amount of Crowbars. But what if you were unable to finish Tiger Mines (and couldn’t get all Crowbars)? Then you will need to wait until the Mazes Event. There you can barter more Crowbars for Acionide with the Maze’s Merchant.
These Boxes and Barrels can be put into your sled and brought to other lands, and even be placed there. But once placed, they cannot be stored again. They will occupy precious land space until opened. You can place them all at once, or place and open one by one.
Tip: Leave unopened Boxes or Barrels sitting endlessly inside your Home Storage. Do not place them unless you really can open them.
Maze’s Closed Trunks
And they’ll sit there forever. No way I’ll spend that much Acionide or real life money to open them.
Similarly to Tiger Mines’ Boxes and Barrels, Maze’s Treasures (small piles of coins you find there) will drop Closed Trunks. These trunks require a special item to be opened: the Workbench. Unlike Tiger Mines’ Crowbars, the Workbenches must be intentionally bartered with the Maze’s Merchant or with Mohan Rich (during Tiger Mines event).
There are 2 types of Workbenches. The normal ones take a while to work and can open up to 5 Closed Trunks. They are bartered for Acionide during Mazes. The Premium ones can be bought with Emeralds during Mazes (with Merchant) or Tiger Mines (with Mohan Rich). They work instantly and open a lot more of Trunks. Once opened, these Closed Trunks must be placed and opened with a click. They will reward you with lots of energy and resources.
Above you can see I let them sit in my Storage. Acionide is quite hard to get and the amount of energy invested to get the Workbenches is way more than the output delivered by Closed Trunks. If you are a Premium Player and can spend the Emeralds, go for it. In comparison, it is the cheapest Energy/Emerald rate in the game. But for me as an almost free player, I invest all Acionide into Puzzles.
You can talk to Maze’s Merchant to acquire various special items, including missing Crowbars.
Prizes and Gifts
Part of the game’s core is to get Prizes and Gifts as you progress. Gifts are awarded generously by developers. From the News, from daily activities, for Holidays or common celebrations, you will always be gifted something just for playing the game. Sometimes, you’ll get more energy just by logging in the game.
December is a special month when every day you get a Gift as a logging in award. Many of these Gifts will yield Live Energy when opened. I usually save all of them to open at once. This grants me hundreds of live energy.
Prizes are earned as you progress in the game’s activities, such as completing the very first stage at Construction Trust or Road of Gems. As you clear a land, you receive prizes as clearing rewards. Usually, they are at 20%, 50%, 70% and 100% but the percentages may vary. Many times, you will receive lots of live energy when opening these prizes.
Tip: save minor prizes from clearing lands to be opened only when it’s time to go for the 100%. Opening at the end may give you a Pump. Opening them just when you receive may be a waste of energy…
As you play, you will learn when it’s the best time to open a Gift/Prize in order to maximize your energy.
The more you play, the more prizes you get. The more prizes you get, the more energy to play.
Golden Apple Trees
After an Apple Tree is harvested 50 times, it becomes a Golden Statue. Once collected, this statue yields live energy. The same occurs with the Apple Tree “pack” inside the Botanical Garden. If the pack has 15 trees, the output of its Golden Statue will be multiplied by 15.
It is not unusual for a player to let Golden Statues from the Botanical Garden or from single trees sit in their Home Station. It is done on purpose, to get that small Pump from the Golden Trees at the right moment. Golden Statues have no time limit to be collected and have a very special feature: they do not occupy land! You can place many Golden statues one over the other. The only visual indicative that there is more than one golden tree in the same spot will be a darker shadow.
Even though the amount of energy an individual Golden Apple Tree outputs is small, the collecting of many Golden Apple Trees at the same time can help out in some cases.
Tip: Use the cursor to move the Golden Apple Trees to the same spot in a corner of your Home Station. Once live energy is needed, you can collect them. They will also drop some Gold and more Apples.
Searing Grass
This is a very rare item earned in some lands and events. You use it to activate Sanderra’s Ancient Monolith.
Sanderra is a permanent land located at the Extinct Sea, west from your Home Station at Blue Peaks Valley. You can see it at the main Map or looking for it in the Airplane interface. It is one of the worst permanent lands, if not the worst. It is way harder than any other land, making its clearing very difficult. Even Monterra, that comes AFTER it and still cannot become a settlement, is easier. But finishing Sanderra will reward you with a powerful mechanic.
At Sanderra’s end, you will find the Ancient Monolith. In order to activate it you need to use a Searing Extract, which you can make locally bartering 10 Searing Grass and 10 Concrete for 1 Searing Extract. After 24h you can collect an output of 100 Live Energy.
Just like Horton’s lake, you can still use the Ancient Monolith after settling the land.
I personally dislike it and used it only once. Too much work, the cost of Searing Grass is exorbitant and the output is pitiful.
Trader’s Shop
Another source of Live Energy is the Trader’s Shop. This mechanic has been introduced together with the Road of Gems Event. During some Events, you can earn Jasper, a rare material traded in that Shop for Live Energy. It works the same way as the Ancient Monolith, but is cheaper and no further barters are required. The waiting time and low output makes it not useful to me. When not in use, you can store the Trader’s Shop at your Home Storage.
Way more straightfoward than Sanderra’s Monolith, the Trader’s shop is a better option if you need to squeeze another 100 Live Energy points.
Tasteland’s Mayo Shop
Tasteland is a very strange land. Too far to be harvestable, has a lot of immovable decorations in it, and most barters are scams, just like Scalp. There you can make Mayo and with it you can slowly progress snacks up to +65. But the amount of Mayo the Factory outputs is too low to keep pace with the demand from the smaller Barters. You end up needing to micromanage where to invest that little Mayo you make. Making calculations and comparing the time spent, the ONLY profitable way to use the Mayo is to make +100 Olive Mayo.
At Tasteland you can also find 2 Spinners. They can be used every other day. Usually they drop just 1 unit of +5 Mayo, but very rarely they also drop a Mayo Draft. You use it together with Statuettes got from expeditions or made at Jeweller’s Workshop. If you finish 100% of Tasteland, you will earn a Mayo Shop as a prize. This building can be stored when not in use to save some space at your station. It has only one barter available. It uses 1 Mayo Draft and 2 Statuettes for a Gift Set. This Gift Set will yield a small amount of energy, some collectibles and items.
Too much work and no fun makes Jack a dull boy, or something along these lines…
Once again, in my opinion, too much waiting for too little return. Even Apple Trees got as gifts come more often than Mayo Drafts. Up to the moment I’m writing, I’ve got only 19 Mayo Drafts.
Toy Conveyor/Eric Show’s 2048
Some time ago, there was a building called Toy Conveyor, related to the character Achilles. Recently it was discontinued and removed from all playerbase. The minigame was incorporated into a new mechanic called Eric Show’s Games.
It works just as the 2048 game, which you can play here: https://mgarciaisaia.github.io/2048/
Every 5 hours you can play it to get up to 25 Live Energy. The game is so easy that it is almost guaranteed that you’ll get a boost of at least 10 Energy each time you play. I use it all the time. Many players disliked the game, mostly because of the clicking mechanic. The original game is played with the keyboard, which makes easier and faster to play.
Tip: Play the original 2048 game to improve your skills.
You start with 150 moves. You can buy more moves with Emeralds.
Spinners
Another good source of extra energy is your Roulettes. Many of them award Live Energy as their daily prize.
The best way to manage your spinners is to have a Roulette Manager. It is expensive, 199 Emeralds and never goes on sale, but the gameplay improvement is worth every Emerald. It helps you to spin all your Roulettes at once. Once acquired, you’ll need to keep improving it with Roulette Engines, found in most of the Events. Currently I have 73 Roulettes inside it and 10 outside. Every day they output Emeralds and Energy. The range of rewards is completely random. There are days when I get 0 Emeralds, but once I got 9. There are days when I get no energy at all, while is not uncommon to get more than 200. There is no reliability of the amount, so you cannot count on it to clear a land. But it is still very recommended that you spin them at the right time.
Tip: in the days you are clearing a land, wait for the right moment to spin your Roulettes. If you spin them before the time to clear large objects, you may not benefit from their energy output.
These were the common ways to get more energy. Obviously, there is always the fast way which is just pay for more Energy. If my budget allowed, I would consider paying more for play the game. I invested in Construction Trust twice with no remorse. The purchases are made with your credit card. The process is simple and fast. Pay and the service is just right there. In my case, each BRL is worth 1/6 of a USD. In comparison, for a purchase you make for USD$10.00 I pay BRL$ 60,00. Everything is 6x more expensive for me and (for comparison) the minimum wage here is bellow USA’s.
The Piggy Bank is a Premium feature as direct as possible. Once in a while, you’ll have a Piggy Bank available at home. All energy you spend while Piggy is available is stored in the Bank until a certain limit. Once you reach the limit, you can spend real life money to buy all that energy back. Its price follows the flash sales. It’s up to you to decide if it’s worthy.
Flash Sales
These sales appear every time you start a new adventure. And right there I found the main problem for me to recommend it to anyone. When you start a new land, you should clear the small and medium objects, leaving the large ones to the end, when you Pump up your energy, chop them partially and finish them with normal snacks. But the Flash Sales usually occur at the very start, when they are not needed!
The only way to make them useful is if you consider them a time limit to clear the land. If you are able to clear the land under the time limit of the Flash Sale, then you can consider purchase it at the final phase, when you are Pumping Up. The dynamites you get will help you remove large objects that provide energy givers, such as Iron and Coal deposits without needing to spend your own Energy points.
Este slideshow necessita de JavaScript.
Direct Purchase
The last form or purchase that I remember is the direct purchase. You click your Energy Meter and buy more energy with Emeralds. The more the amount, the larger the discount.
If you have money to keep buying Emeralds, then this is a 2 click operation. You can finish any land (large objects only) with at most 500 Emeralds.
Minor strategies. What to do when you have too much energy?
Until now I have discussed how to get more and more energy. But what happens when you have too much? When you are clearing a land, you may find yourself in a strange situation: you have already cleared all small and medium objects there, leaving only the large ones. E.g., you have now 68 energy at your Energy Meter, but there is not a single object under 93 points. You cannot chop anything and cannot eat another snack! Your Pump is gone and you have no more diggings. What to do?
ALL EXTRA ENERGY MUST BE USED TO HARVEST RYE.
Keep some Vegetable Complexes always set to Rye.
Whenever you have any surplus of energy, use it to harvest Rye.
Whenever you have nothing else to do, harvest Rye.
You need to use 1 energy point (from 44 to 43)? Use that point to harvest Rye.
All your Natural Energy should go into harvesting Rye.

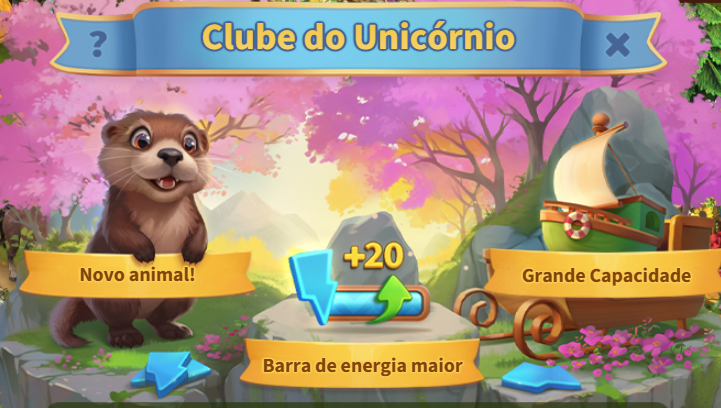


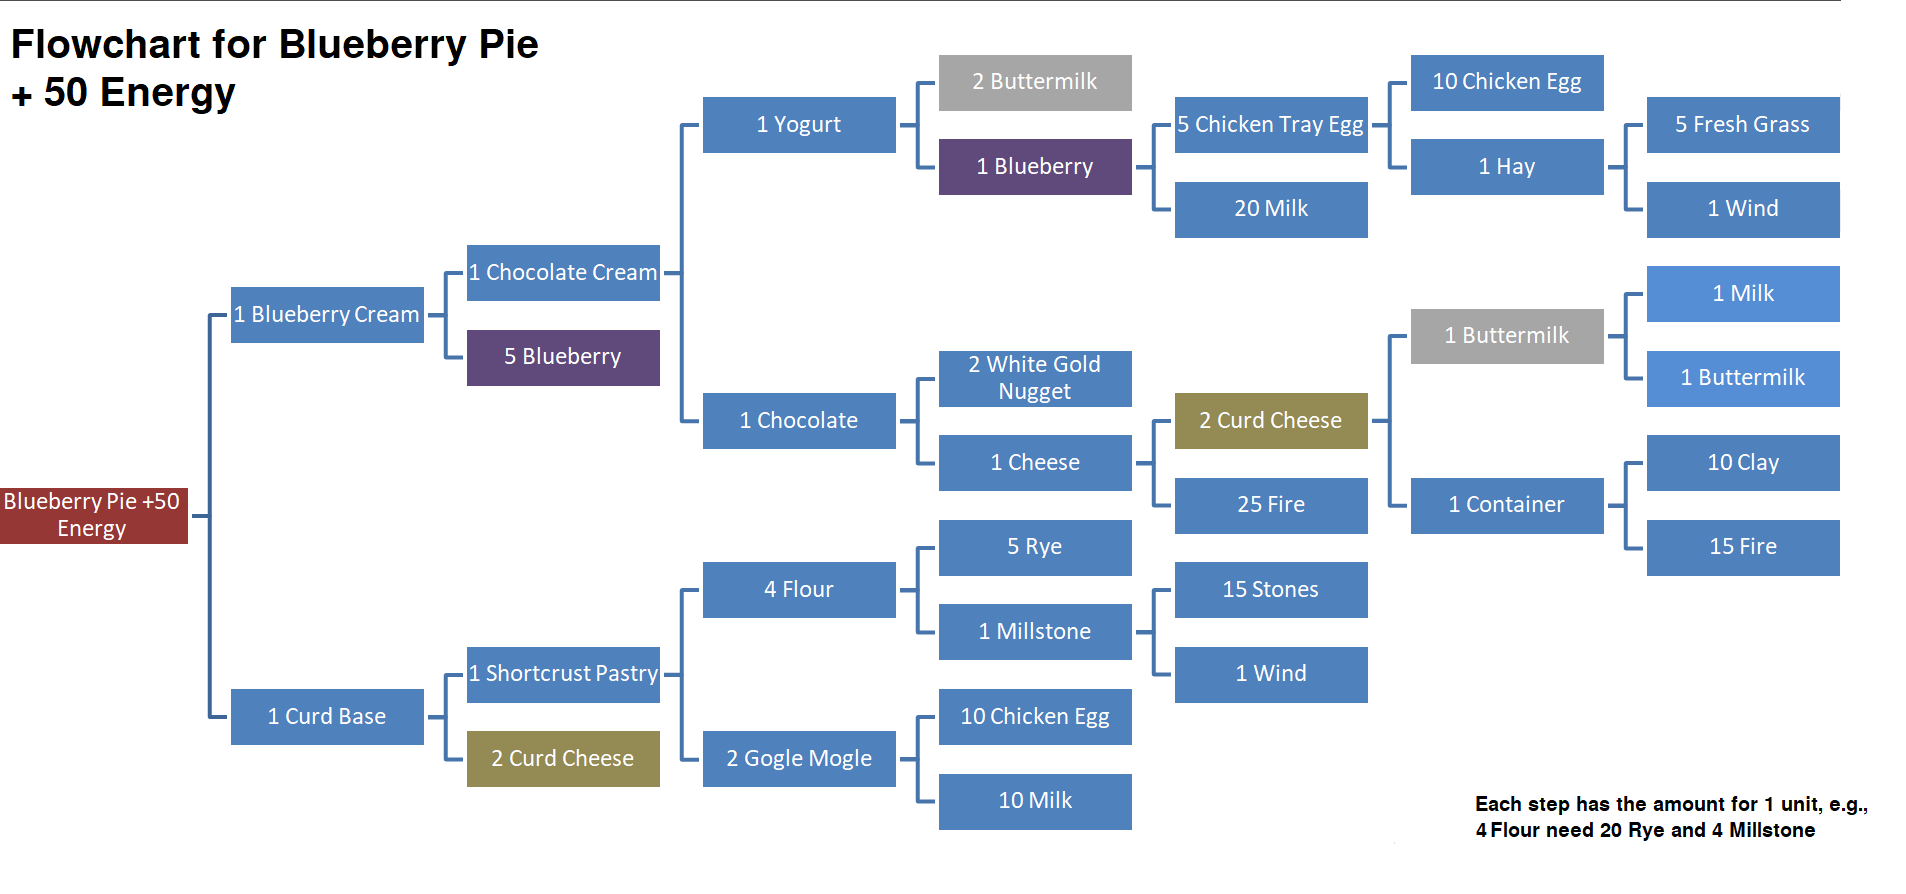
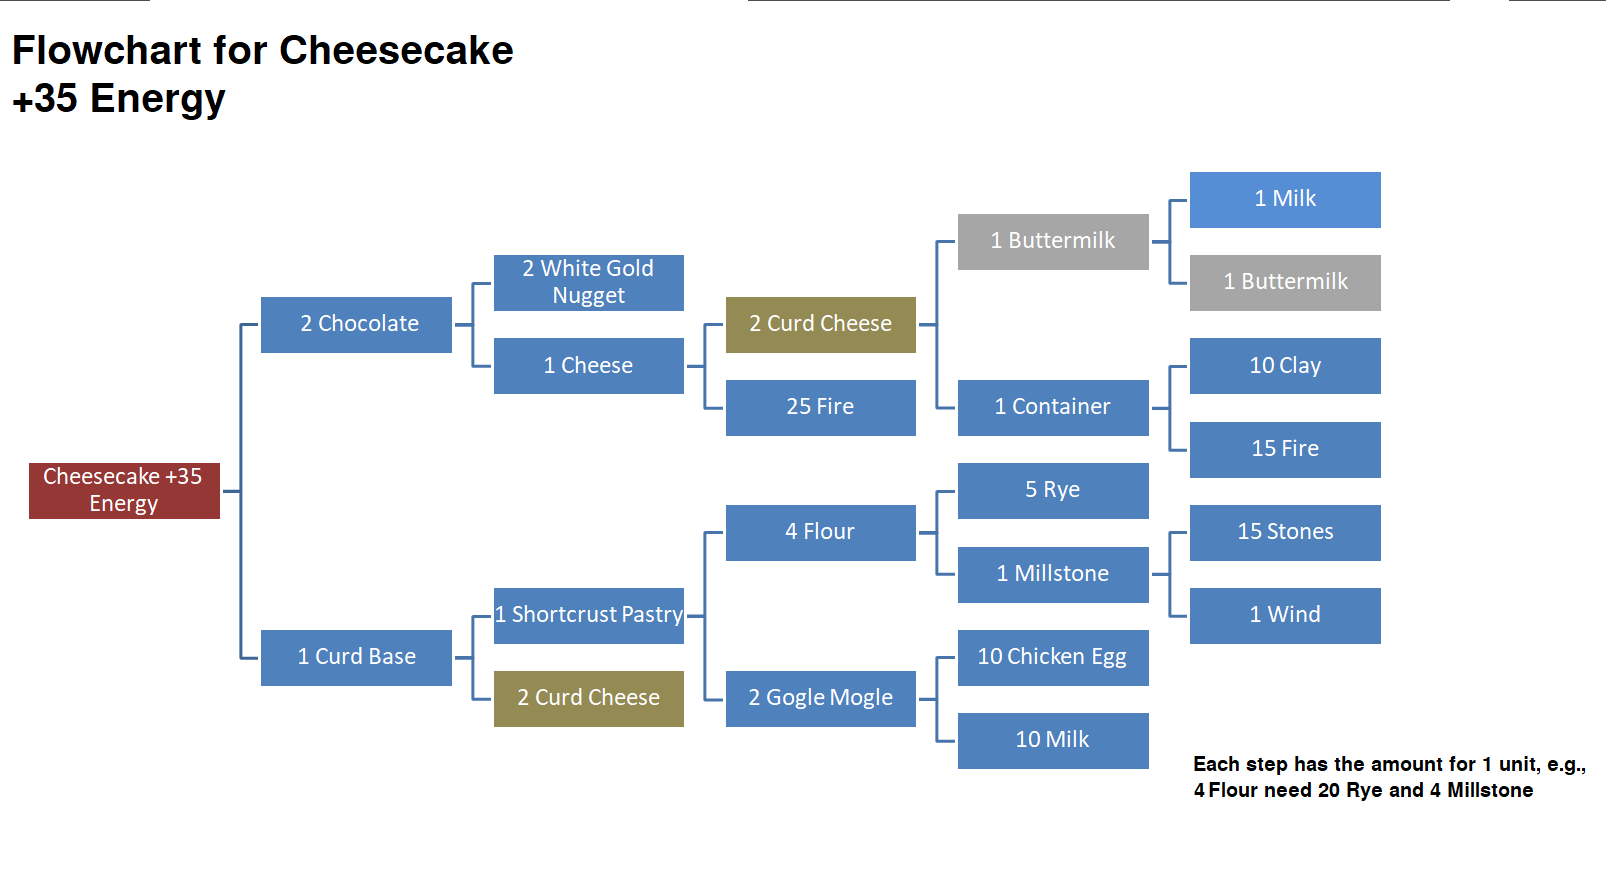
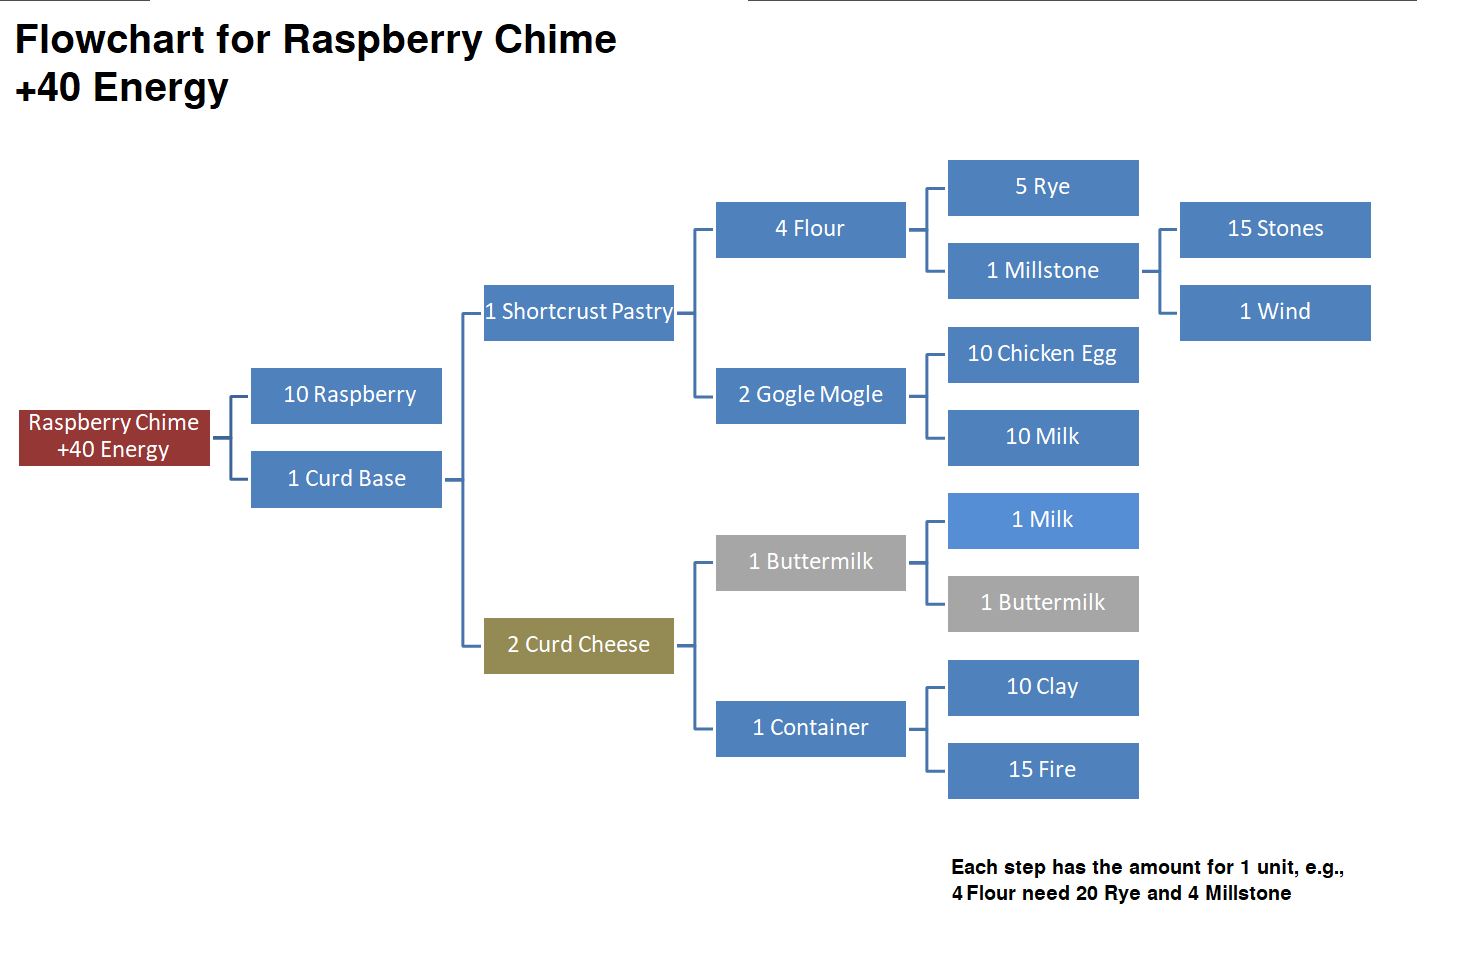
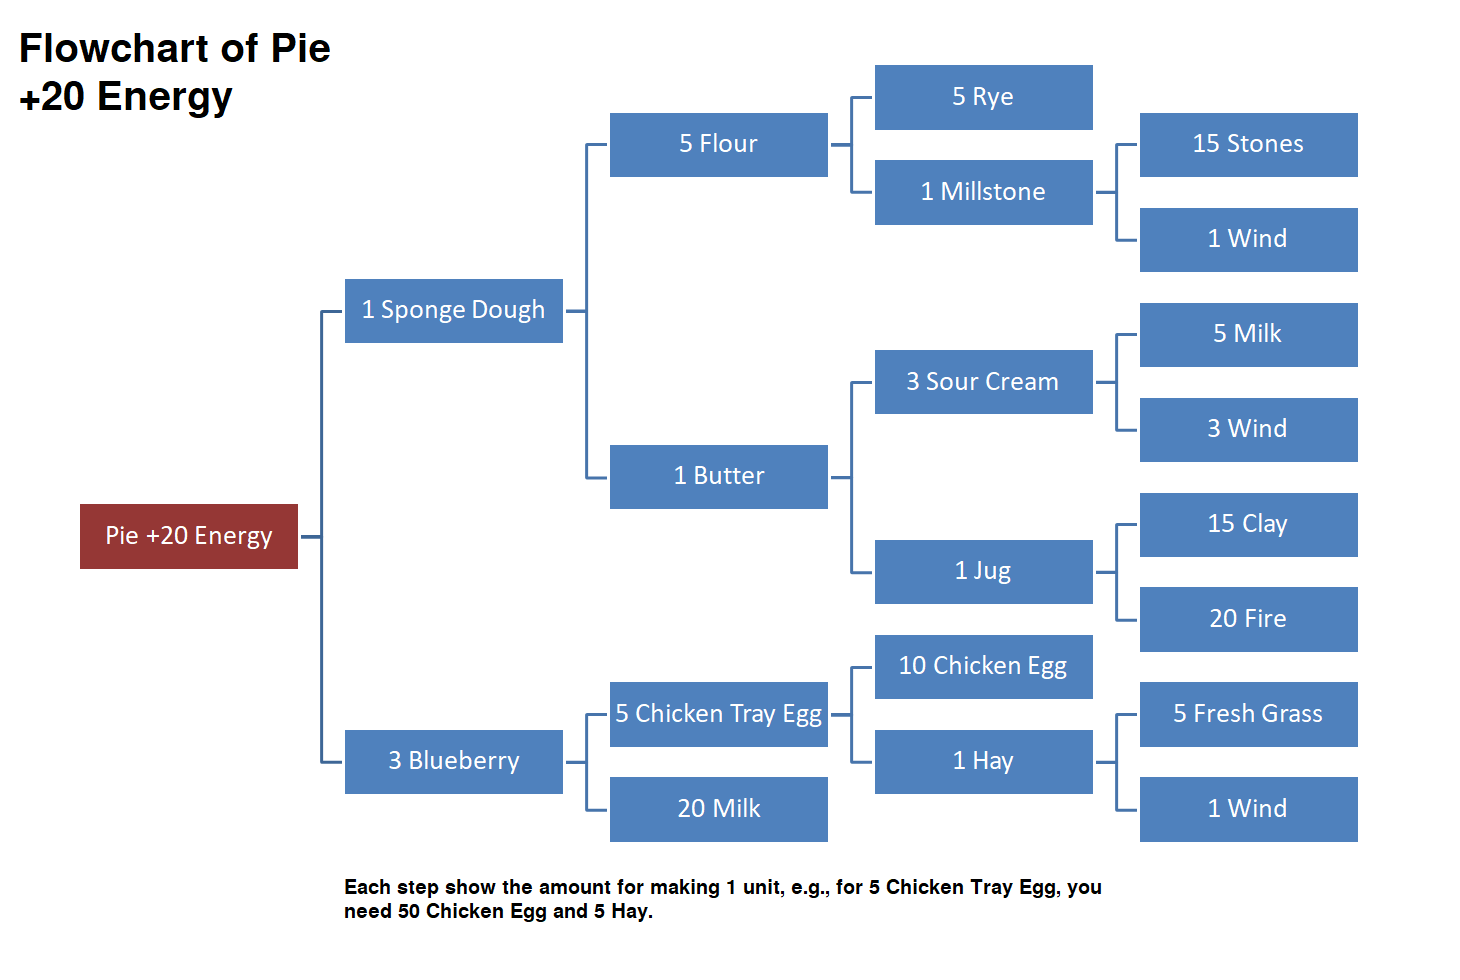

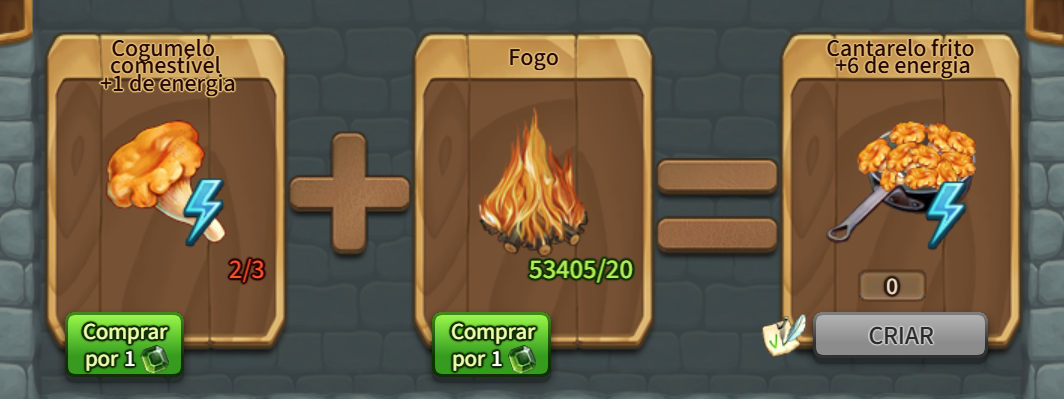
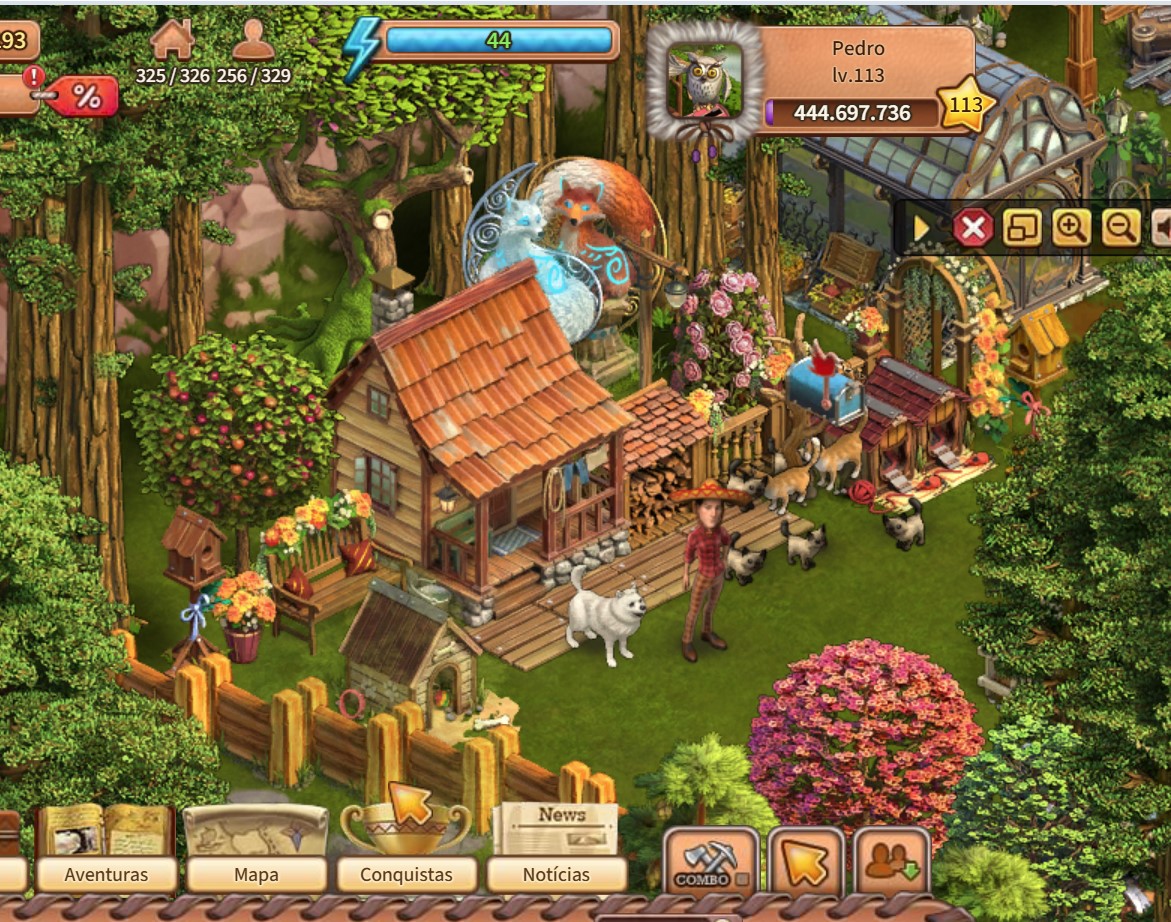
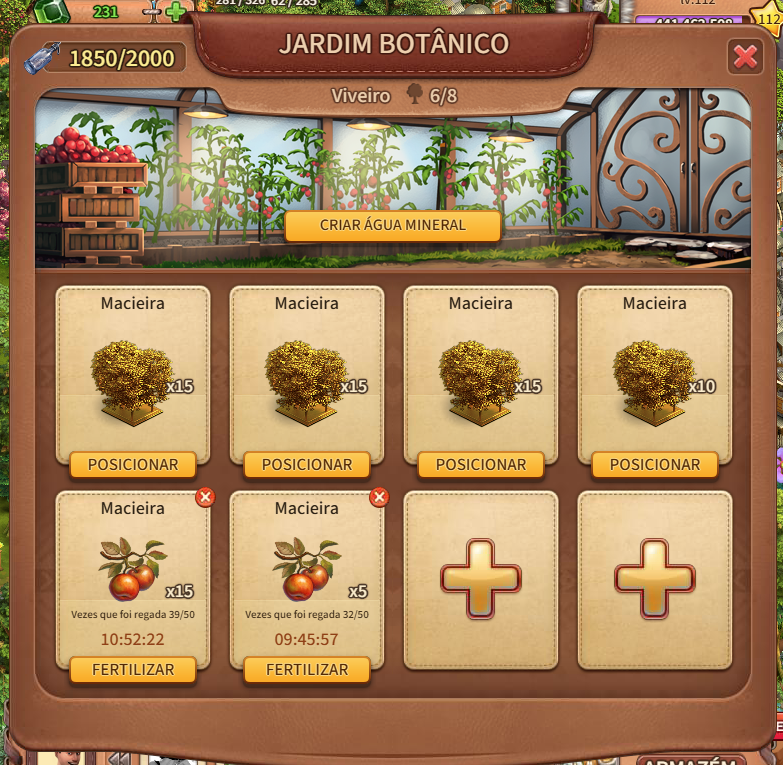
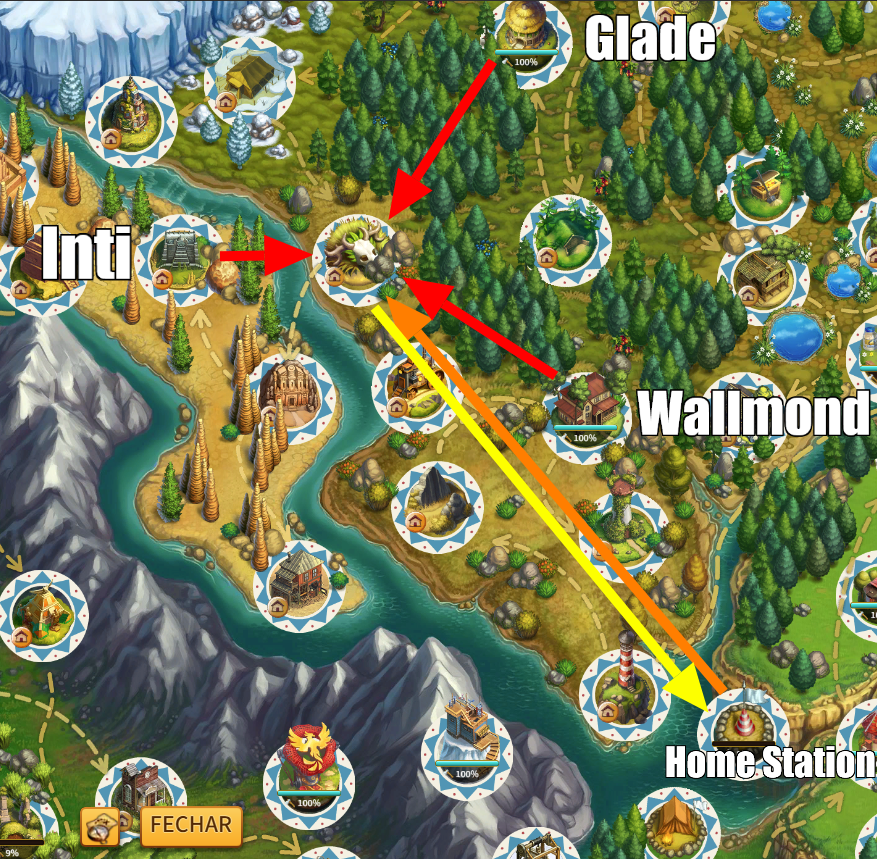
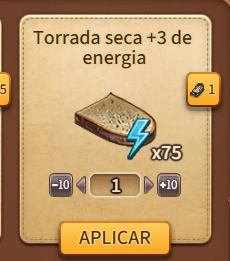

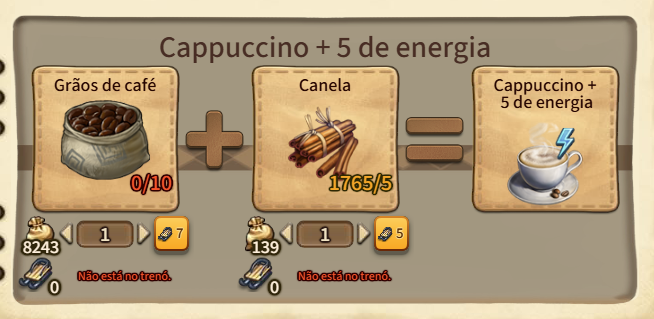
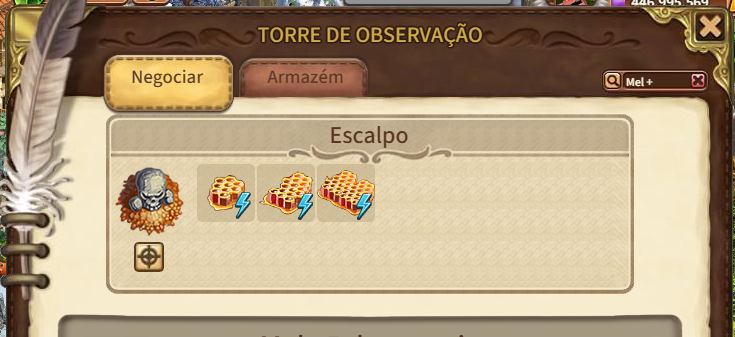
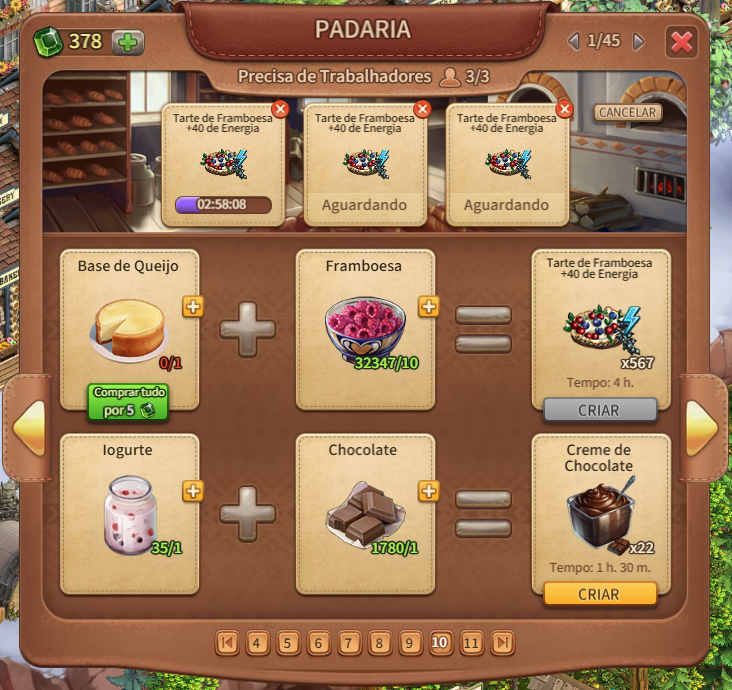
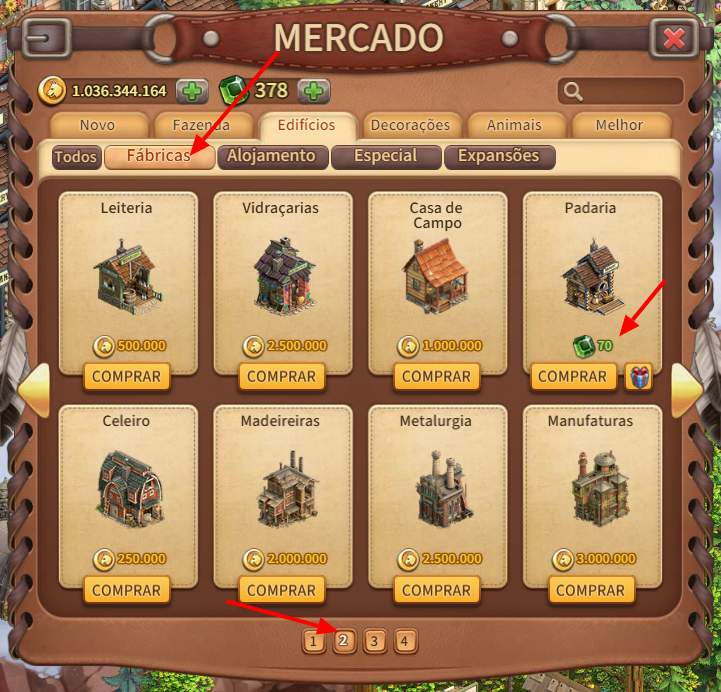
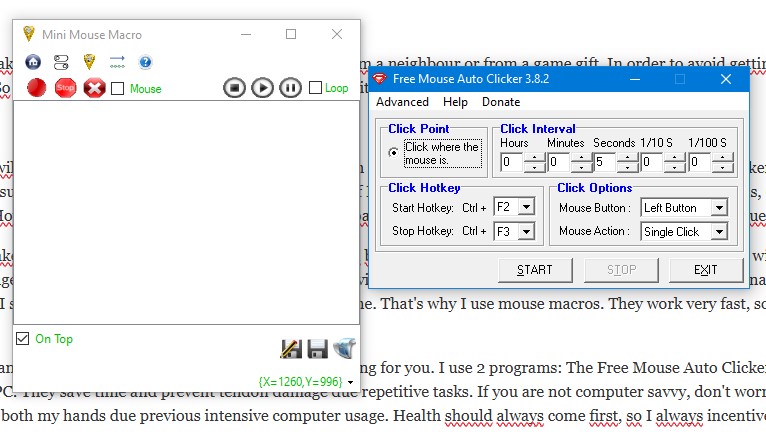
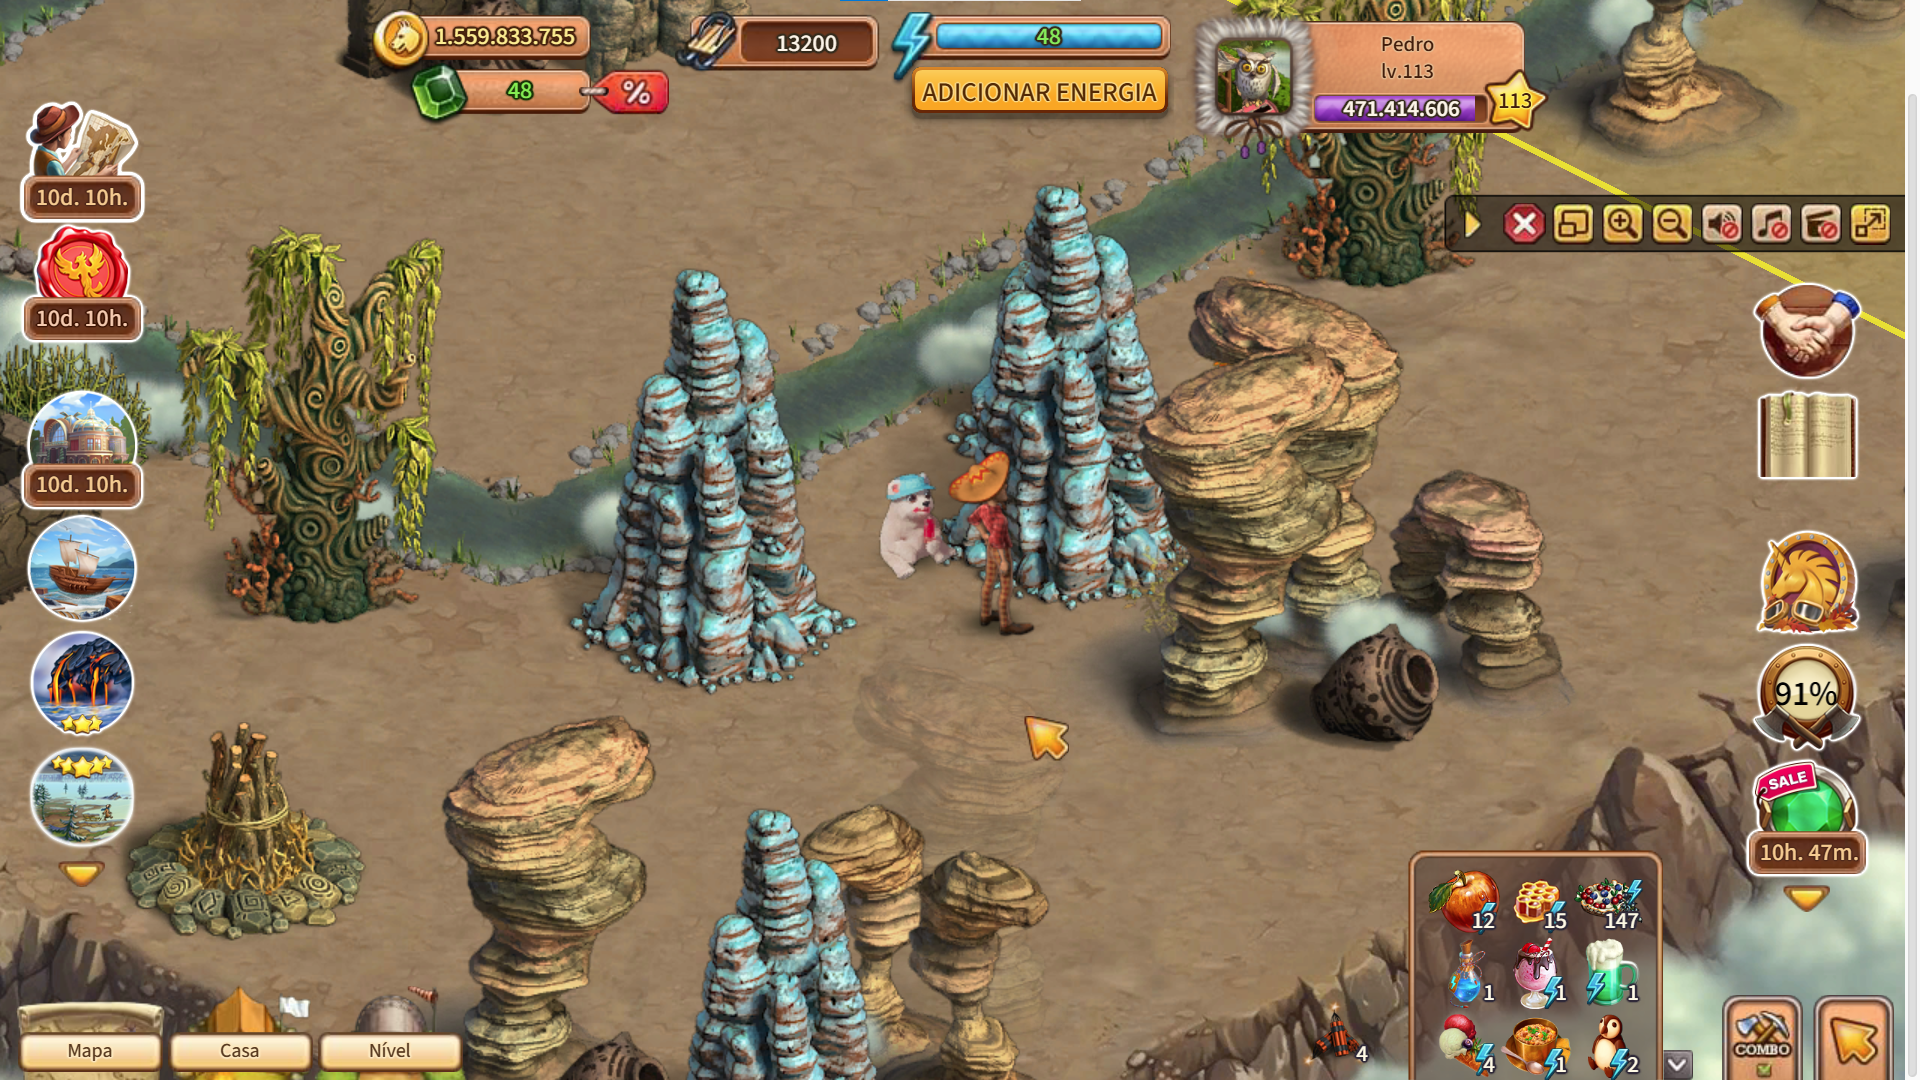
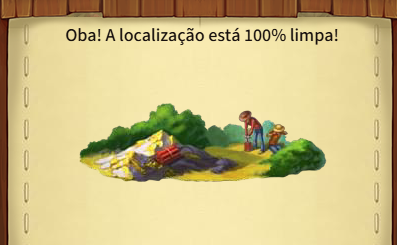
 Consuming the snacks made at your normal Bakeries, you can add at most 50 Energy Points for immediate use. With your Energy Bar at 43 points, you can and eat a Blueberry Pie (+50), maxing out at 93 energy points. It is enough to chop down most objects of the lands in your journey and earn the great prizes granted at 50% or 70% of clearing completion. But to really clear 100% of a land, you need to go way beyond that 93 limit.
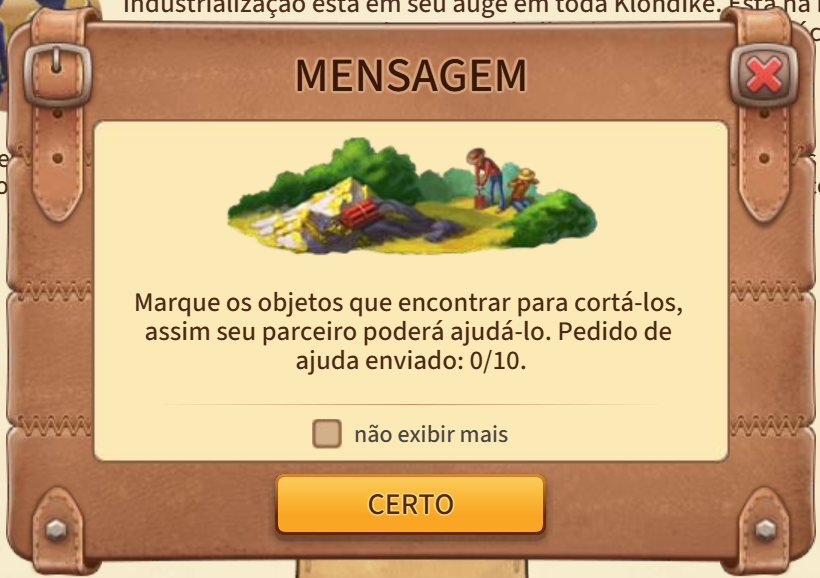
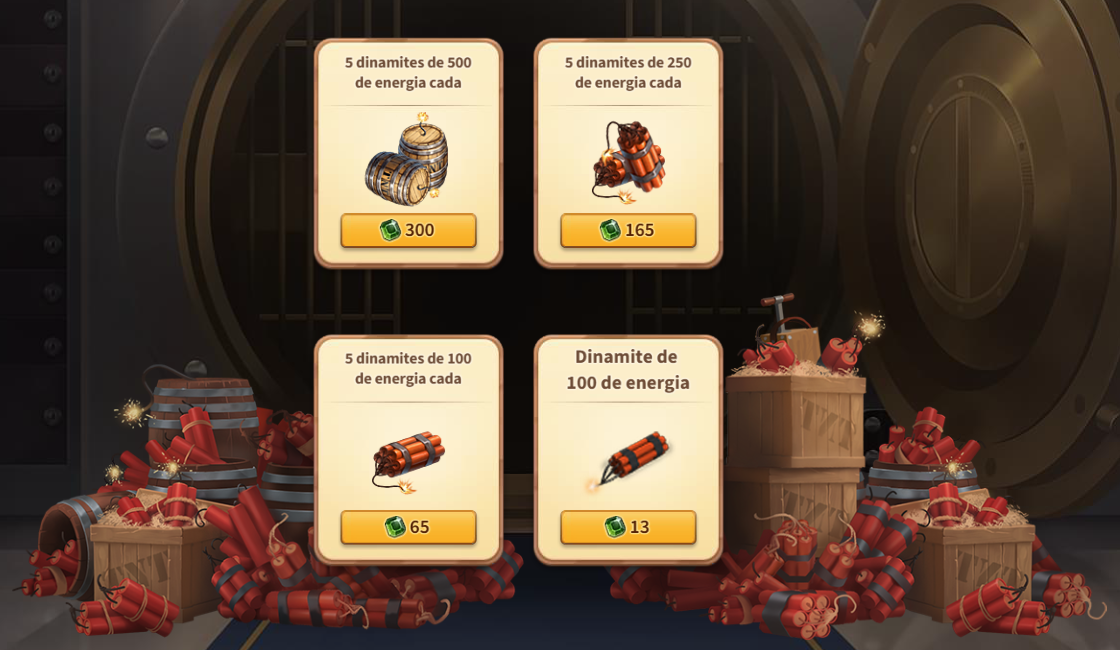
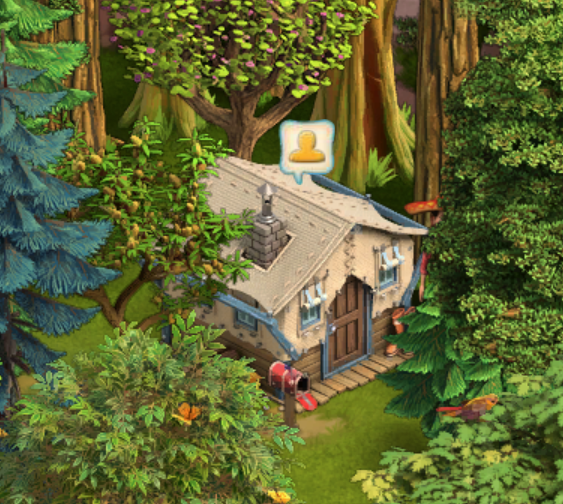
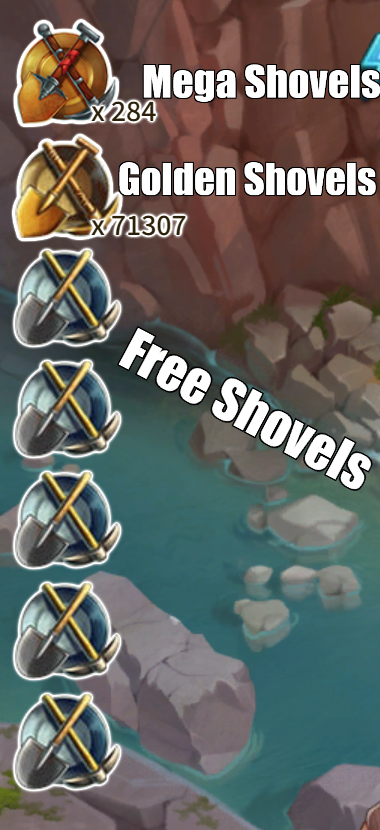 In order to dig, you need Shovels. There are 3 types of Shovels: Free Shovels, Golden Shovels and Mega-Shovels. They are held at your Storage but you don’t need to keep track of them. Whenever you enter a Neighbour’s Station, it will show the amount of each type of Shovels you have.